Installation of the wheel into the frame
Wheel installation
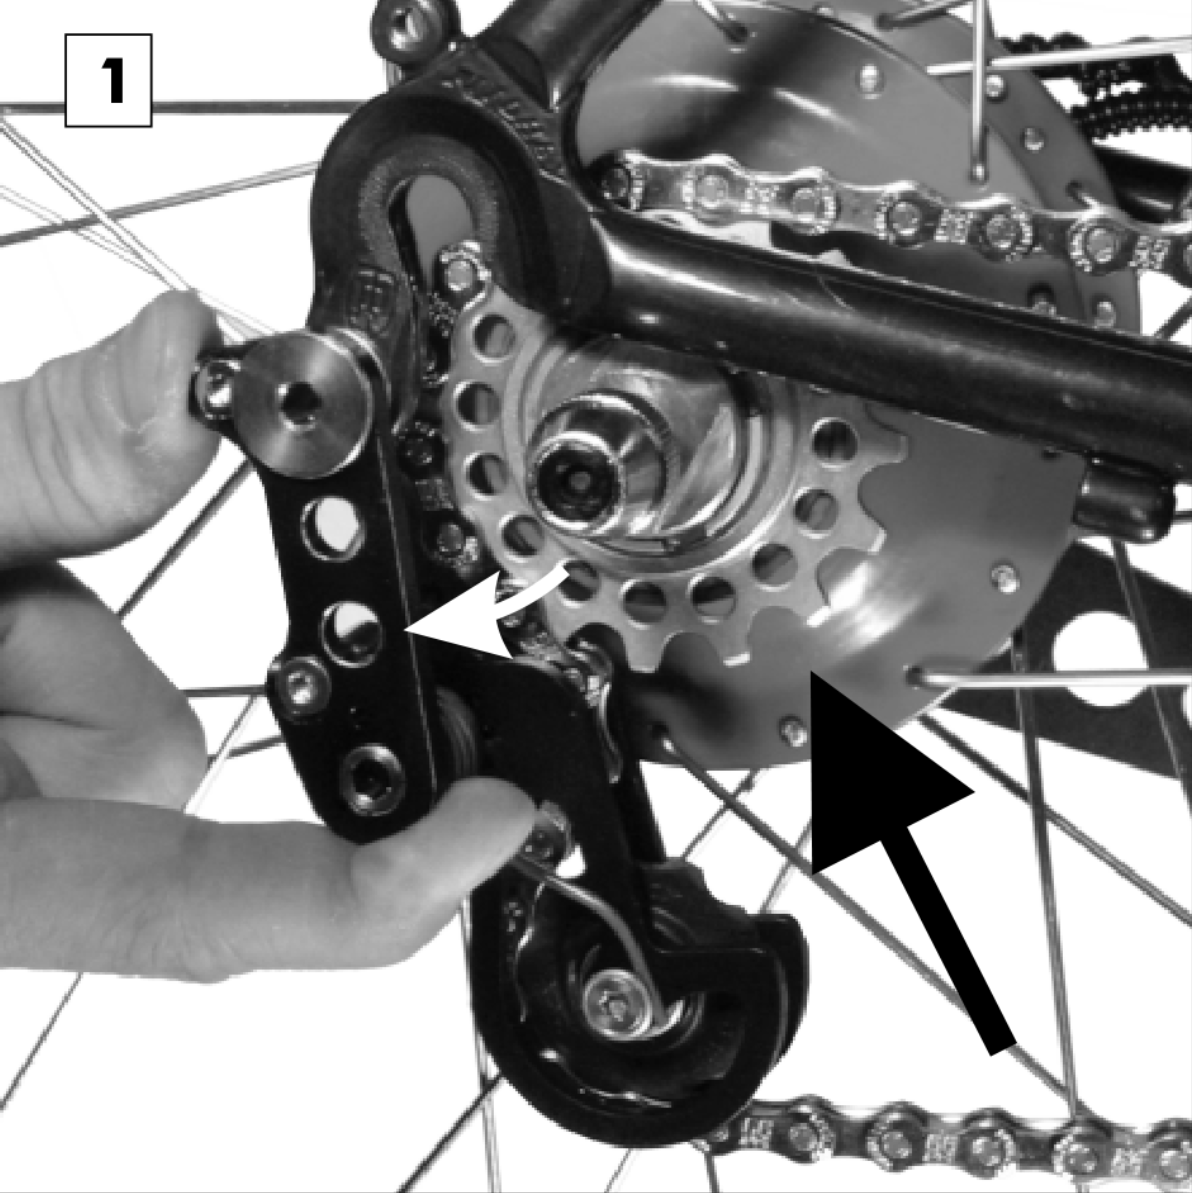
Wheel installation: OEM or OEM2 versions
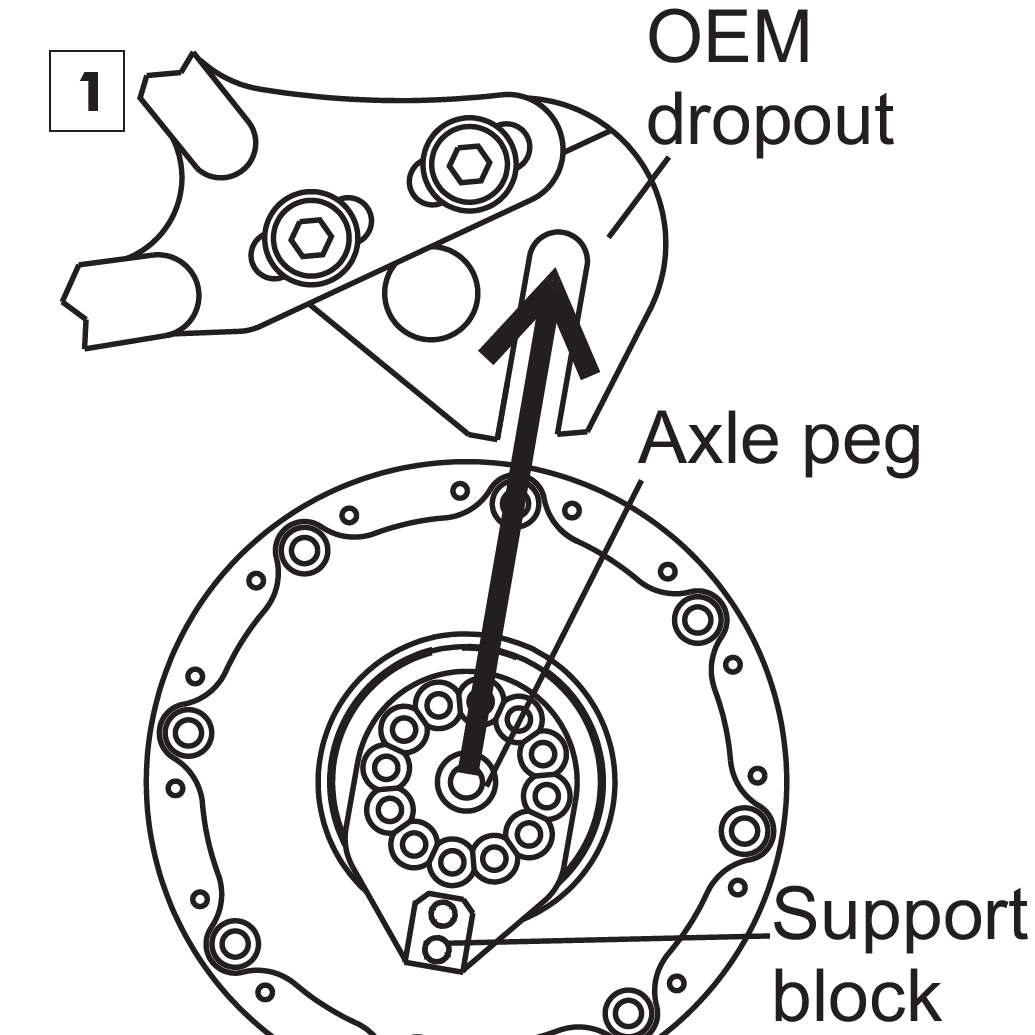

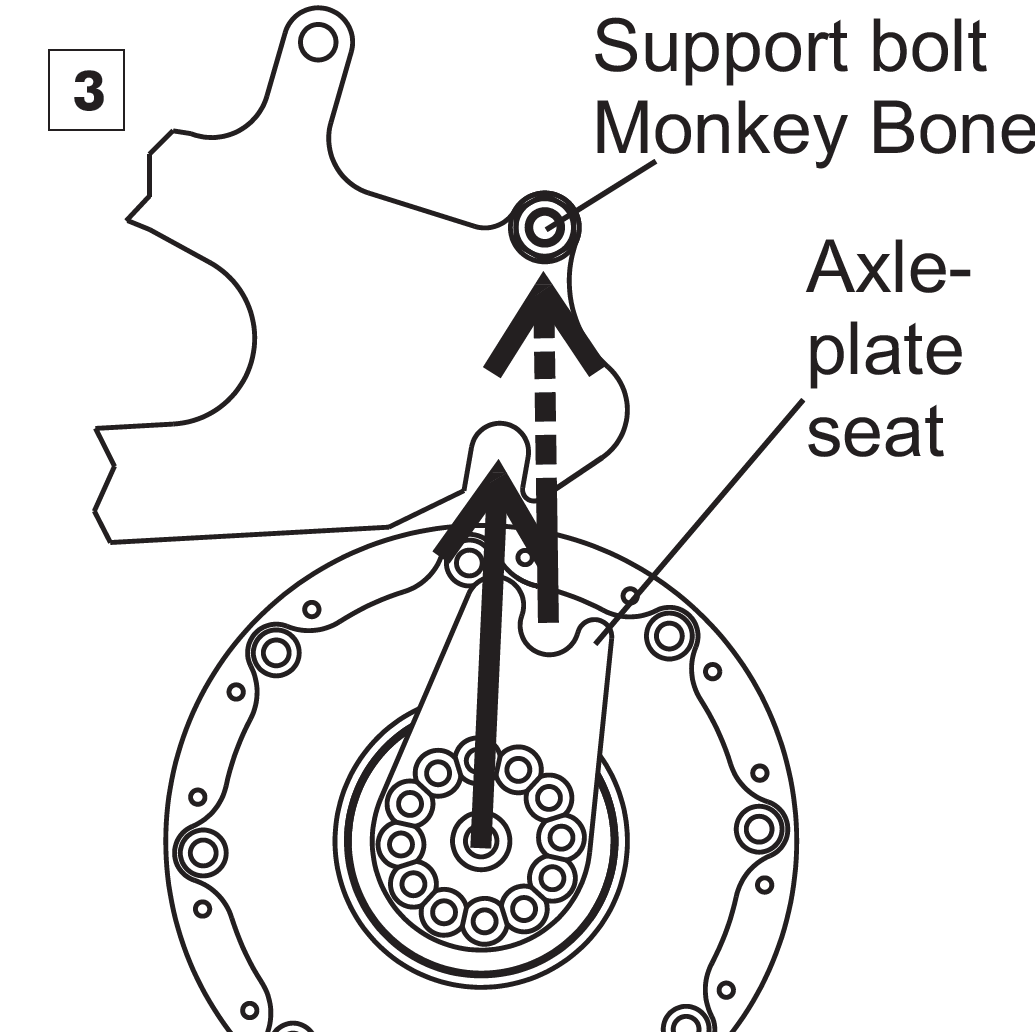
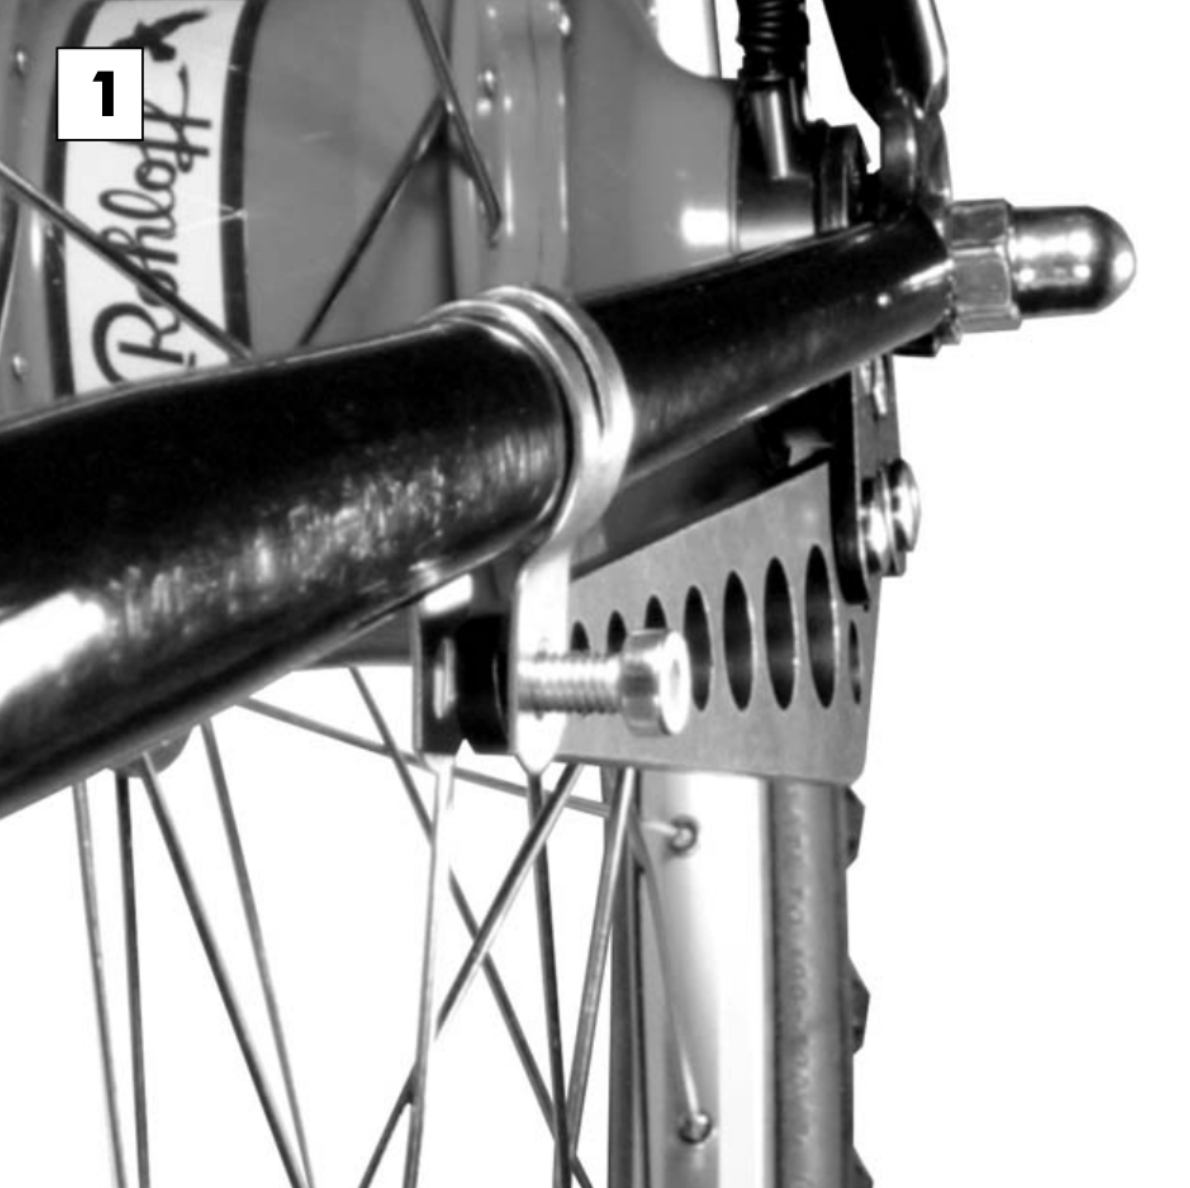
On the OEM2 versions with just a support bolt or Monkey Bone, take care that the support bolt or Monkey Bone lines up with the axle plate seat as the axle is entered into the Dropouts.
After installing the wheel, close the quick release lever (CC versions - tightening torque: max. 7Nm/62in.lbs.), tighten the axle nuts (TS versions - tightening torque: max. 35Nm/310in.lbs.), or tighten the A12 securing bolts (max. 20Nm/177in.lbs.).
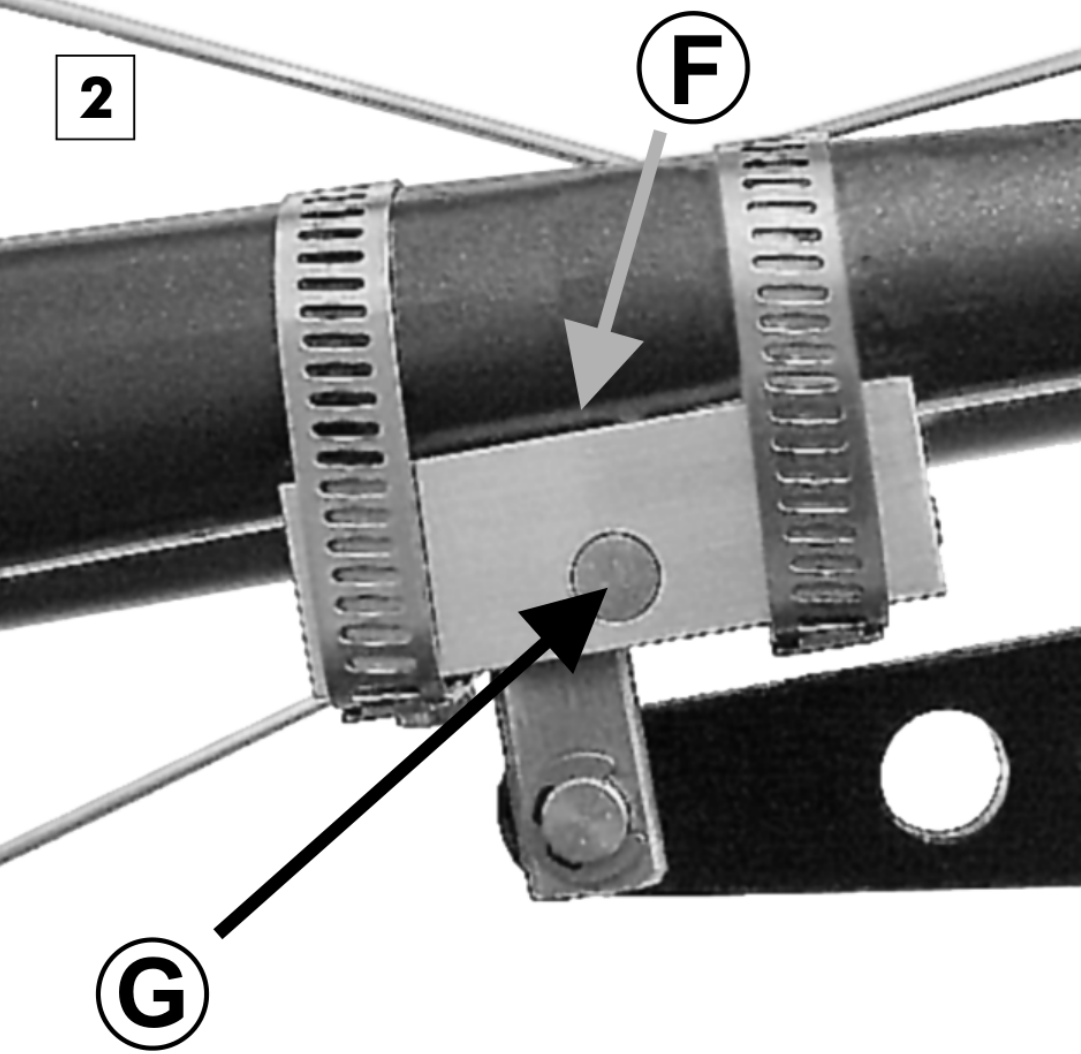
Securing the long torque arm
CC versions
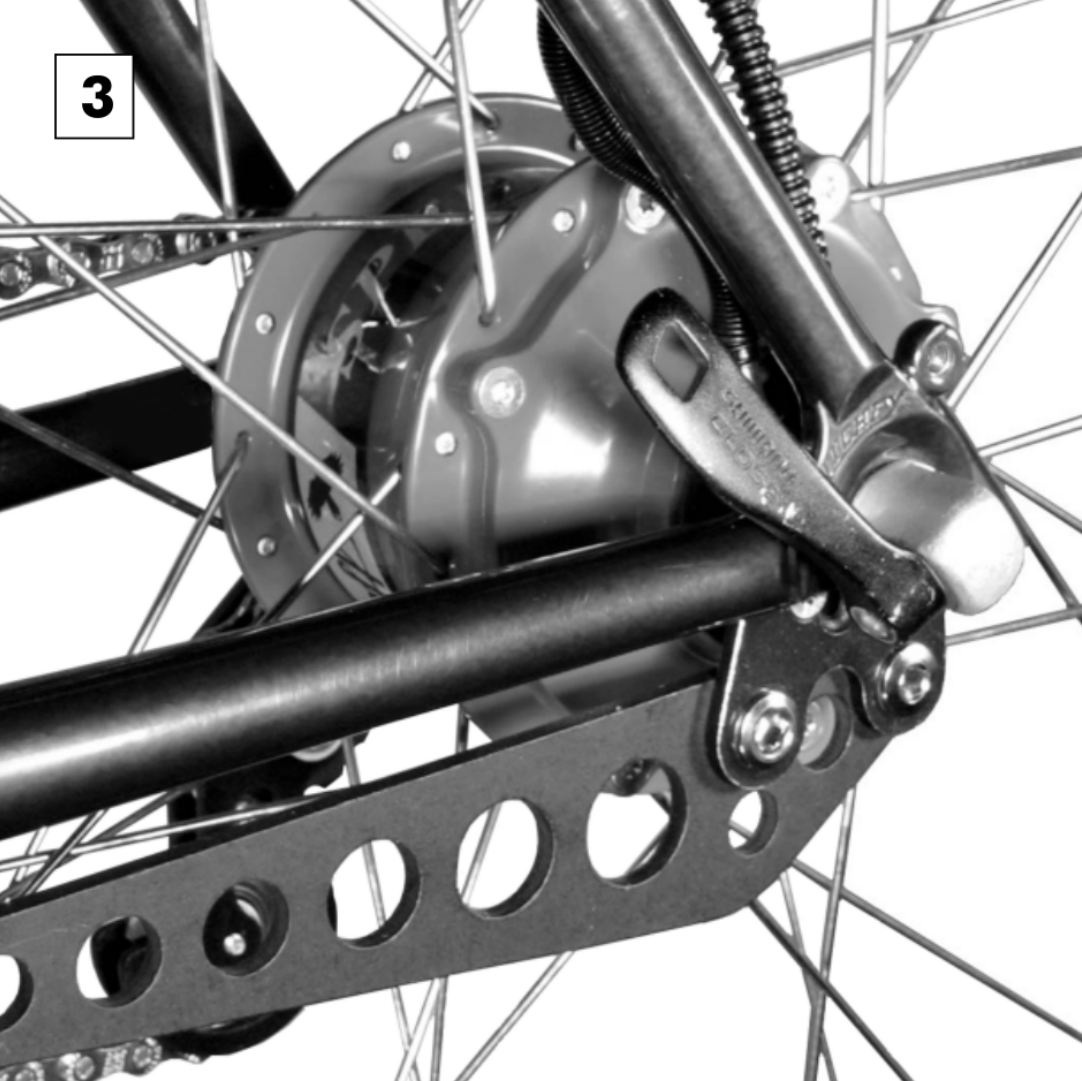
TS versions

Joining of the gear mech
Internal gear mech
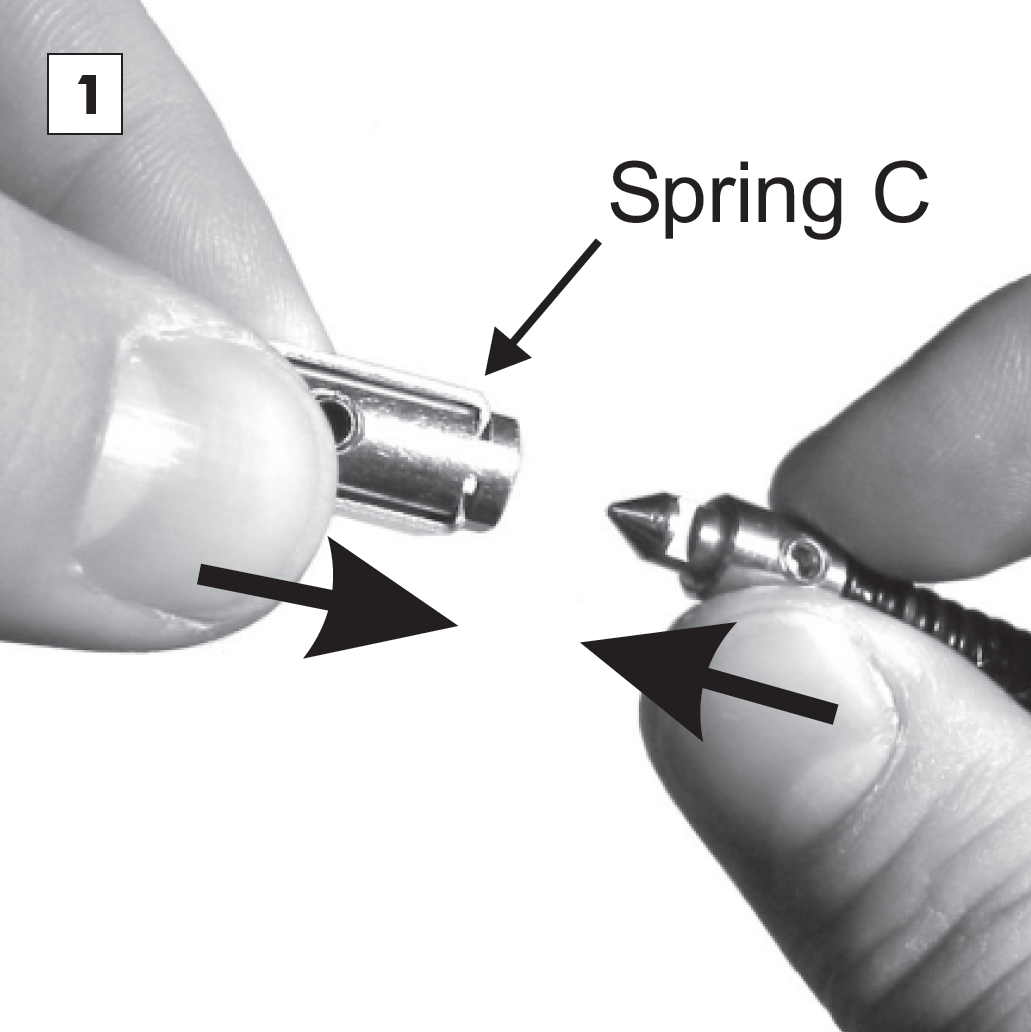
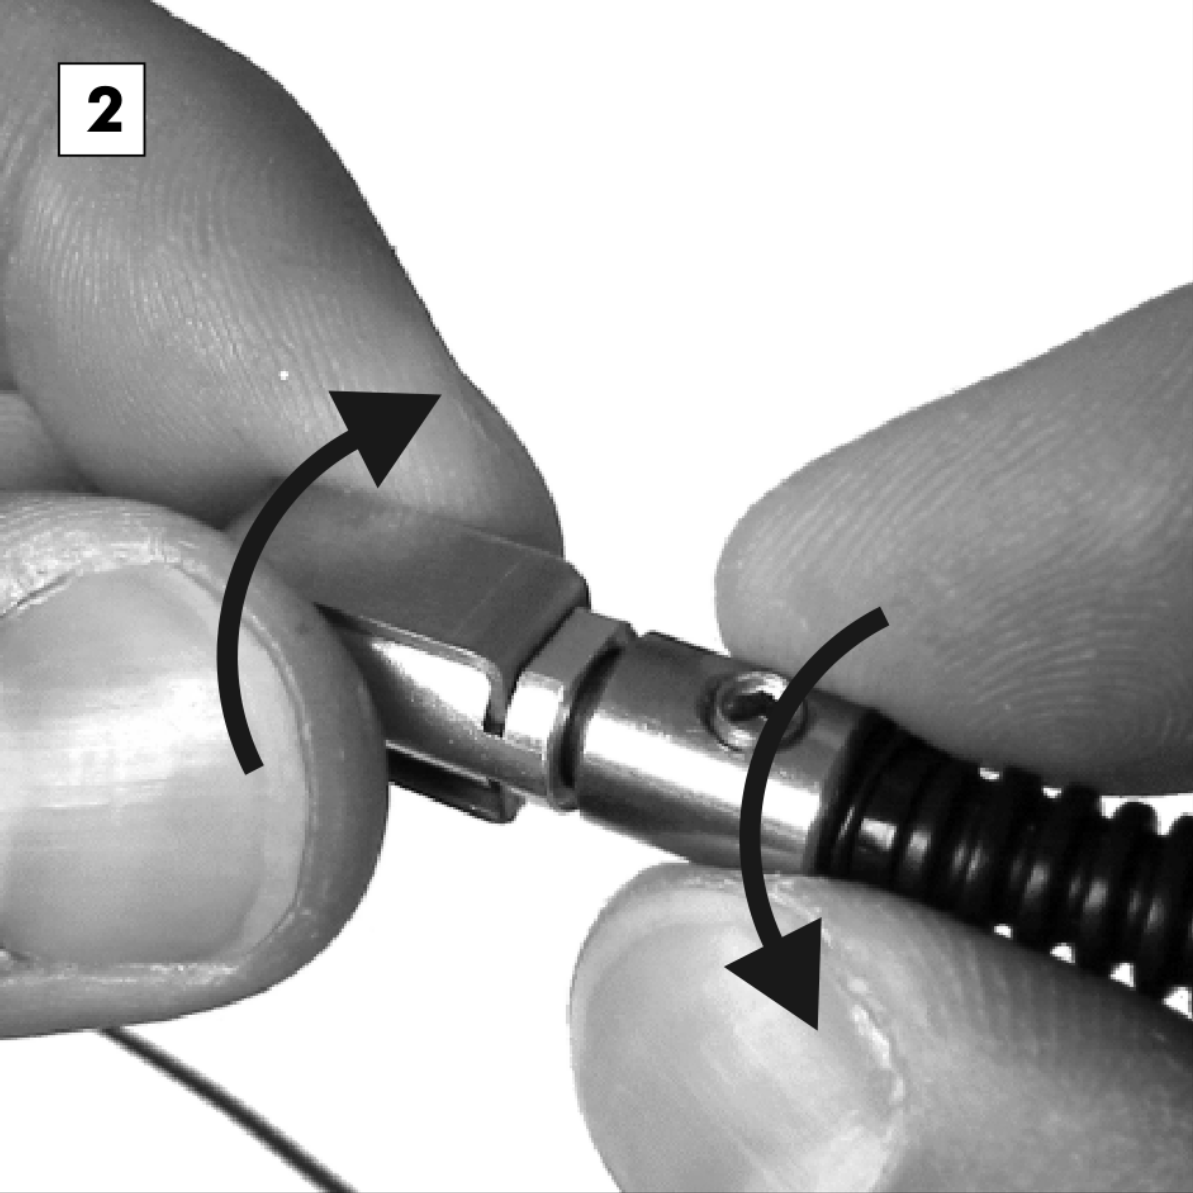
To rejoin the gear mech, the male and female bayonet connectors must be joined back together. Pay attention not to cross these cables over when joining the hub and shifter cables together. Push the male connector into the female connector until the spring locks them together. Take care not to hold the female connector by the spring.
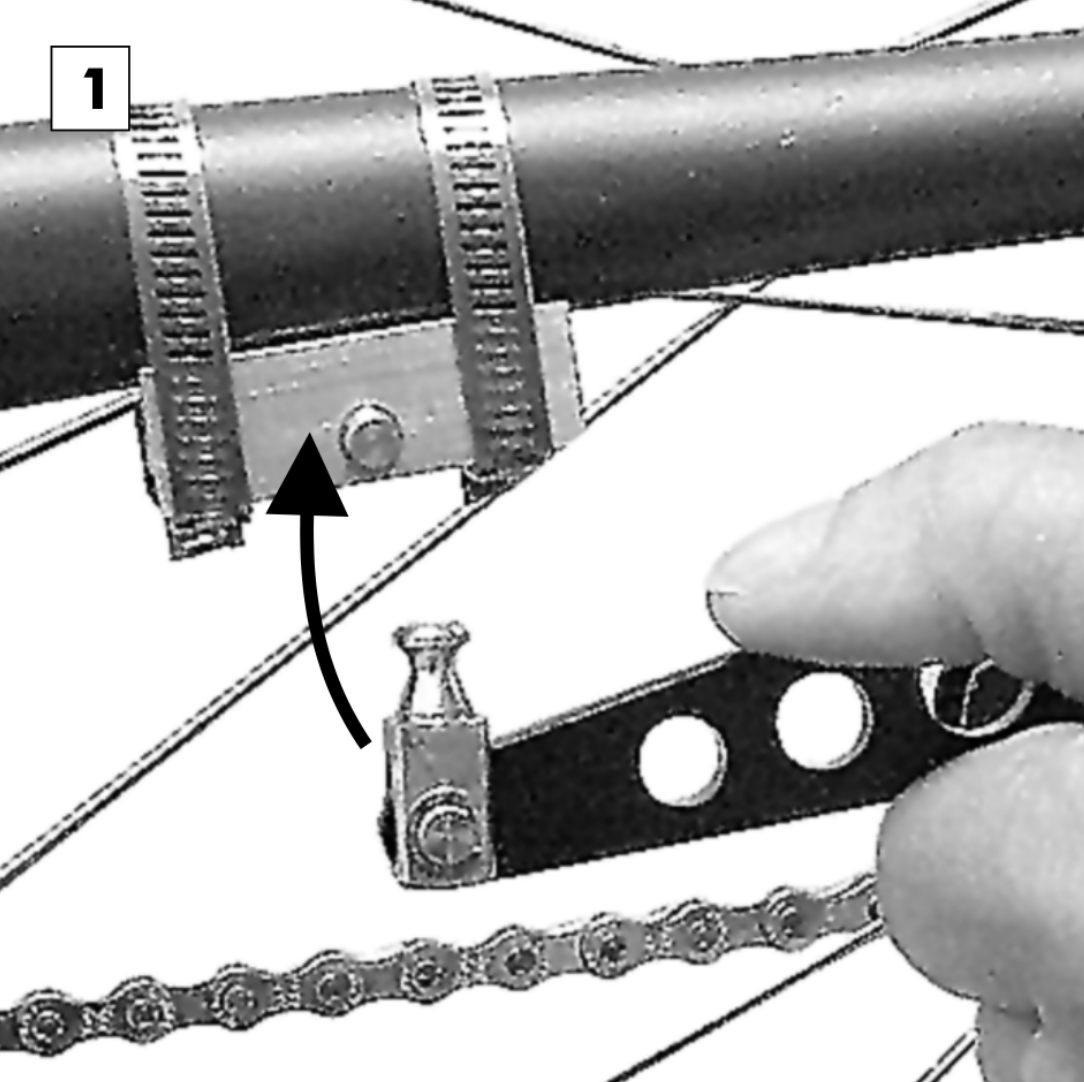
External gear mech

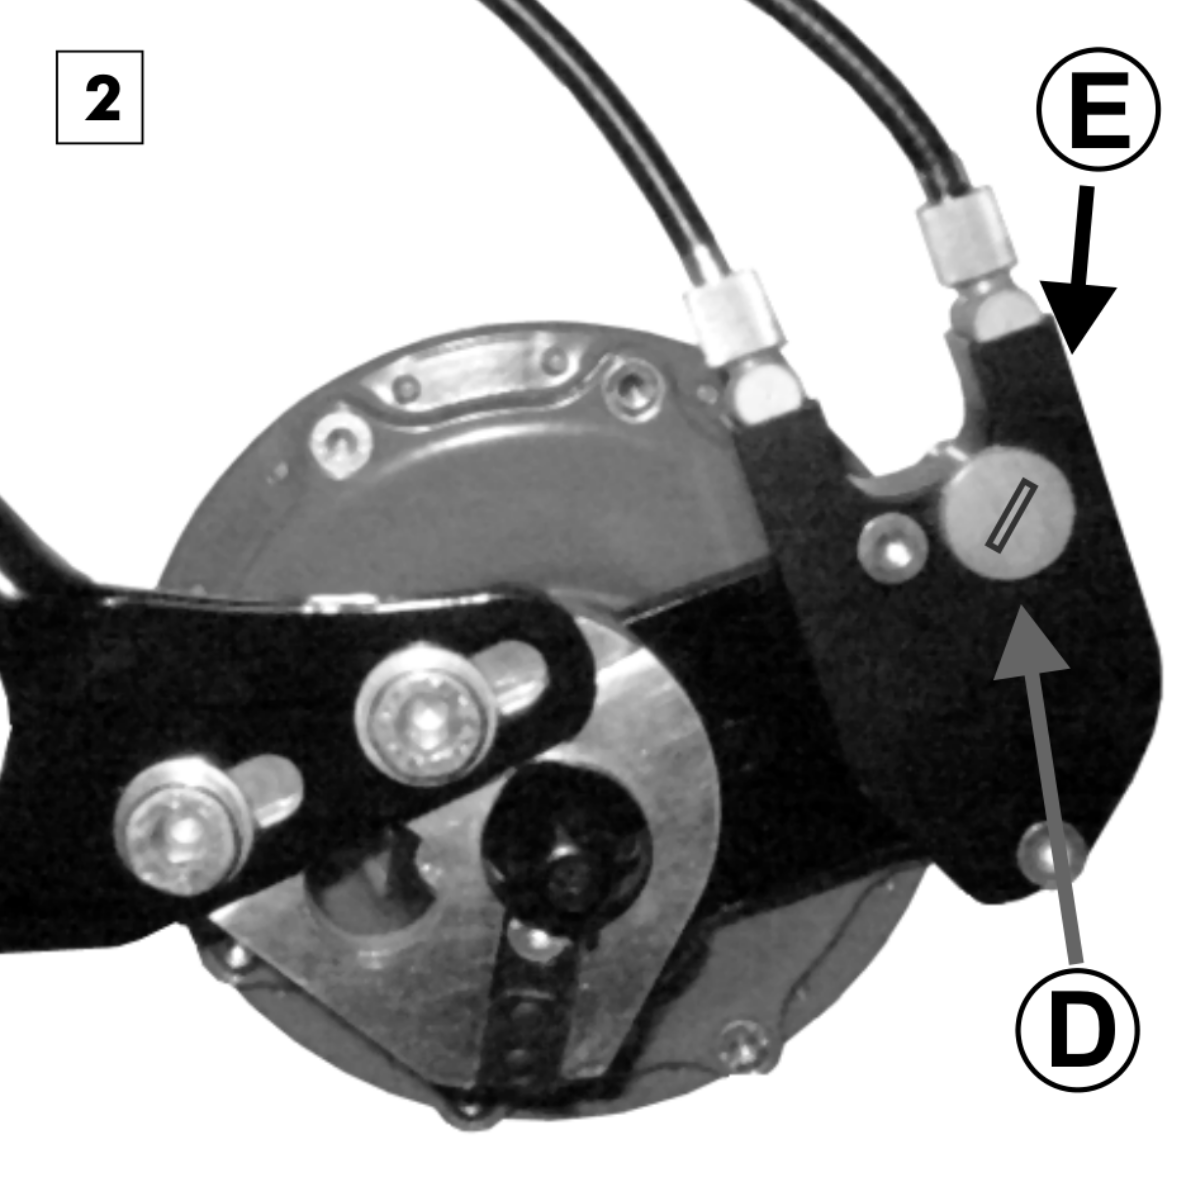
Rejoining the gear mech involves remounting the cable box. Place the twist shifter into gear #14 then place cable box over the hexagonal peg so that the two locating pegs sit into the two holes in the back of the cable box. Turn the twist shifter back and forth around gear #14 until the cable box falls into place over the hexagonal peg. Lastly tighten up the knurled head screw.