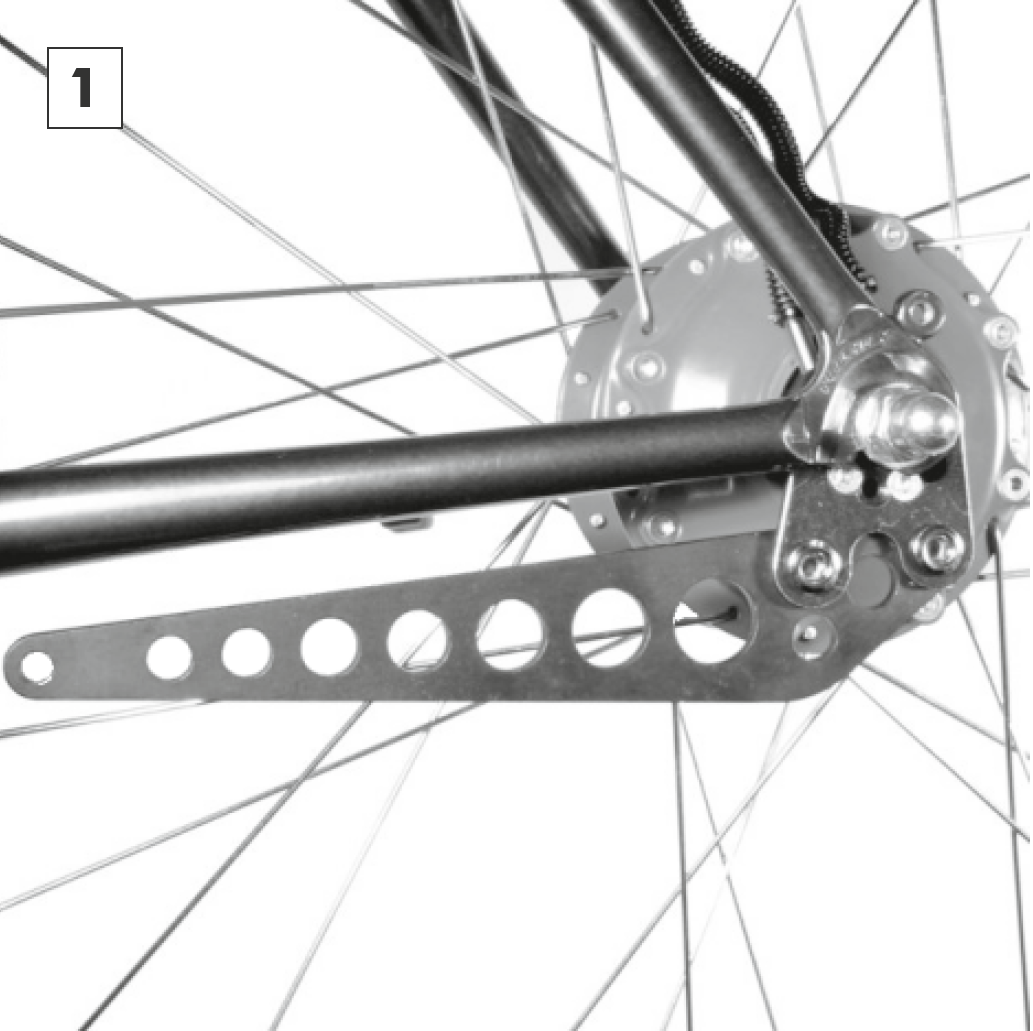
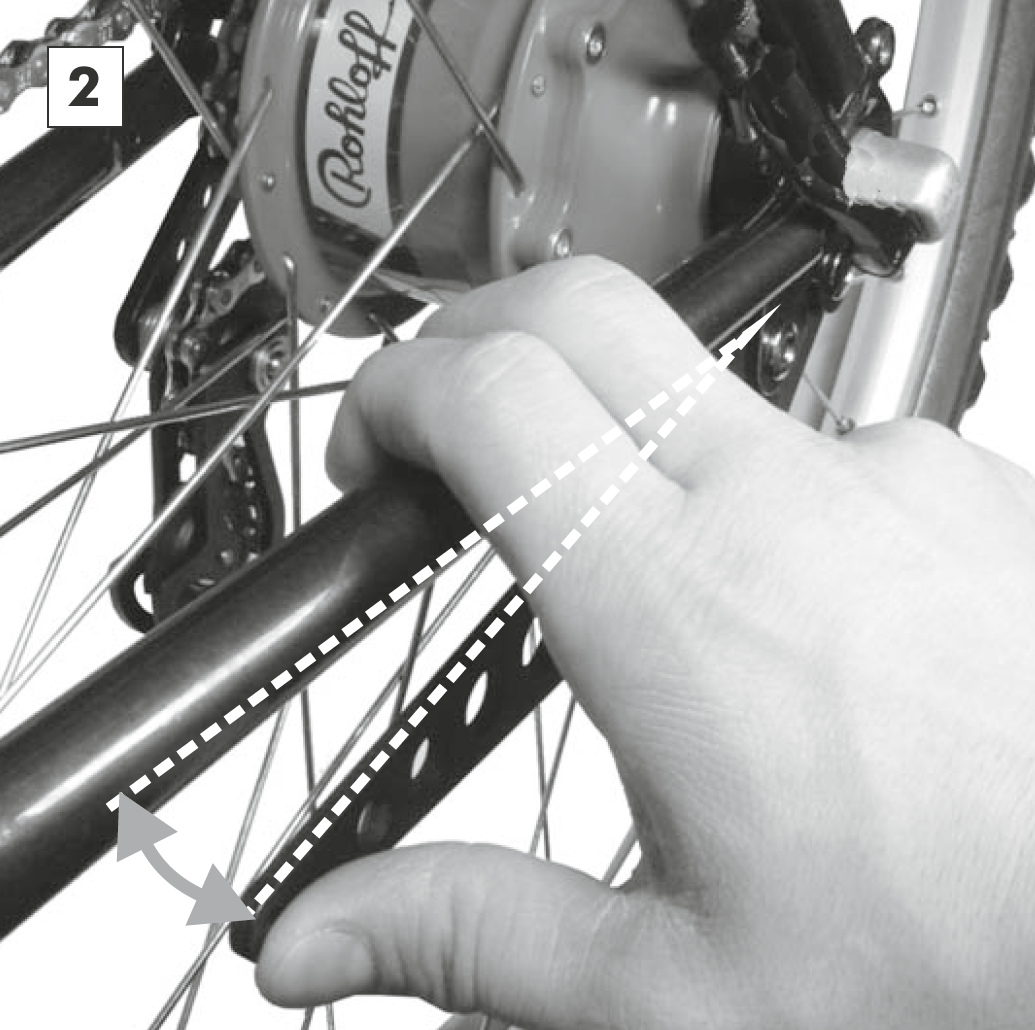
Mounting the wheel
Long torque arm (CC)
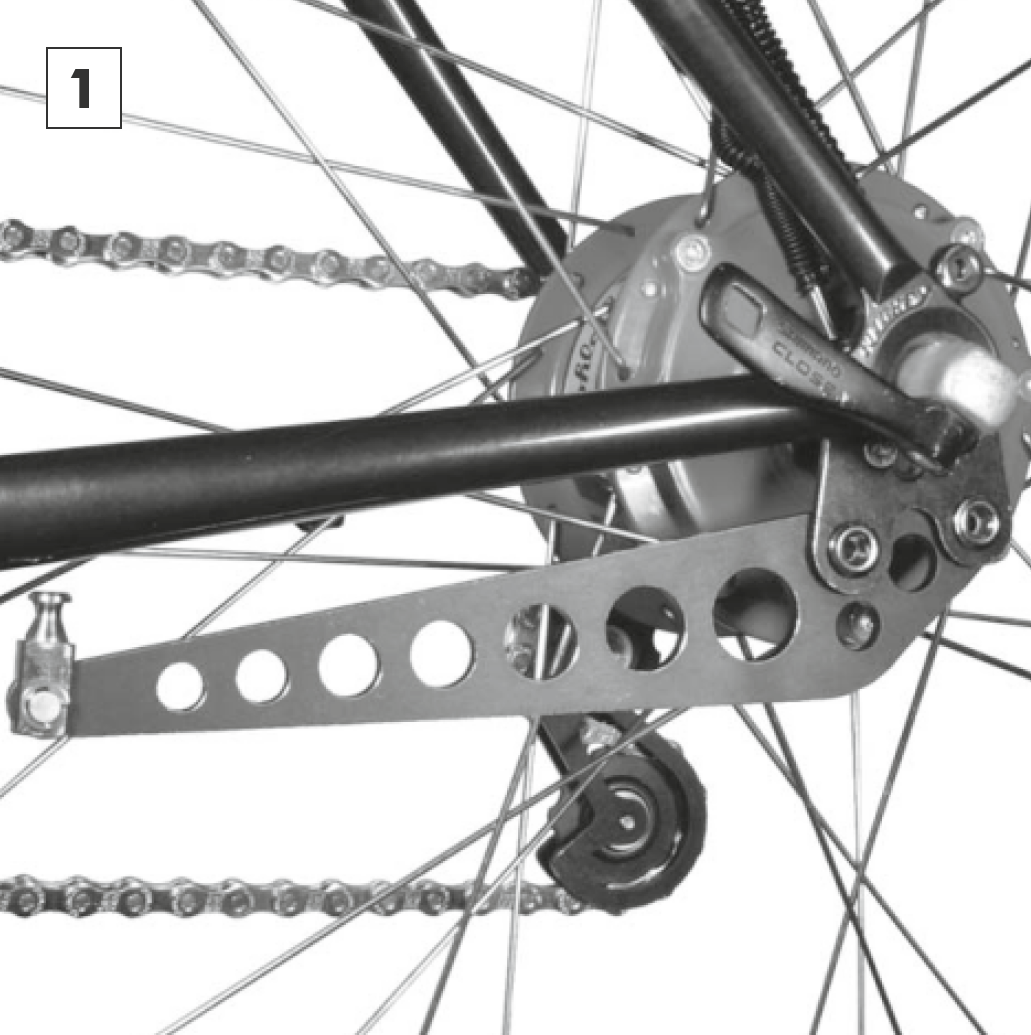
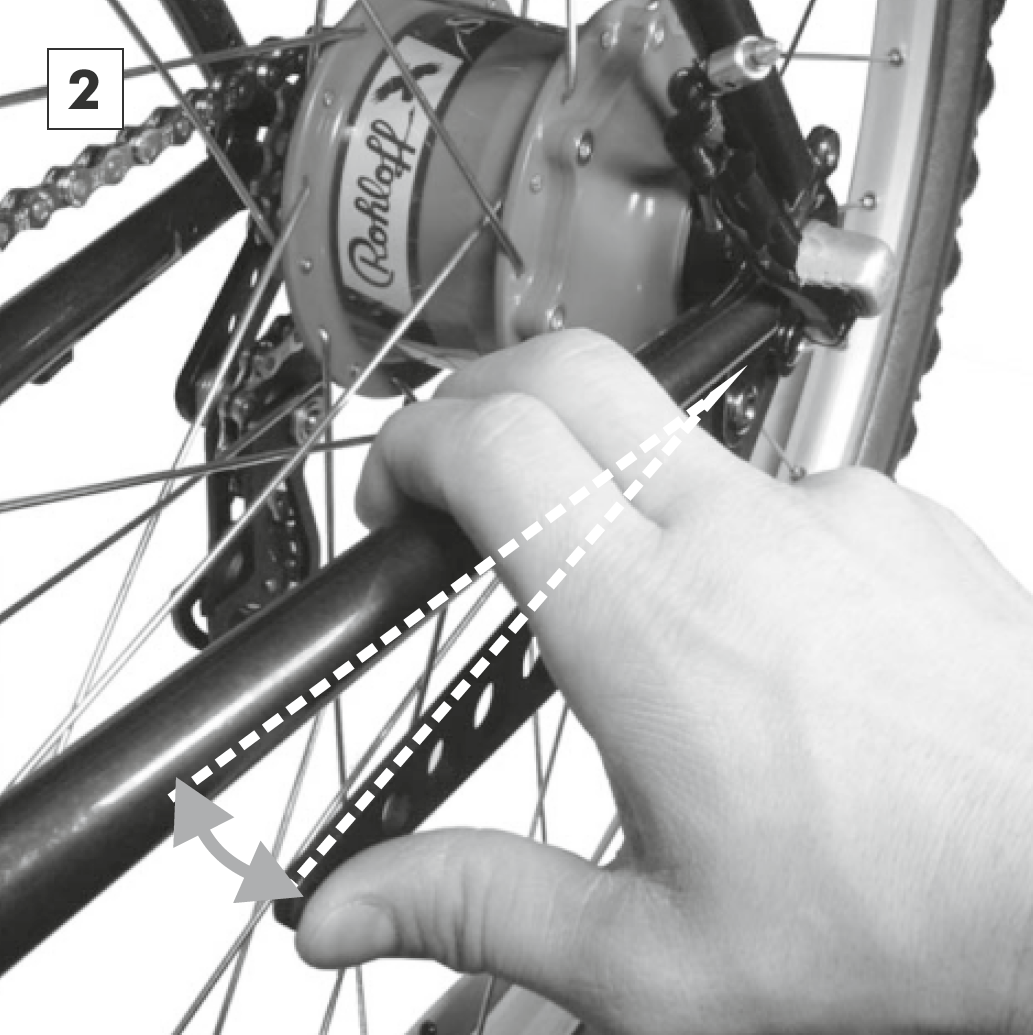

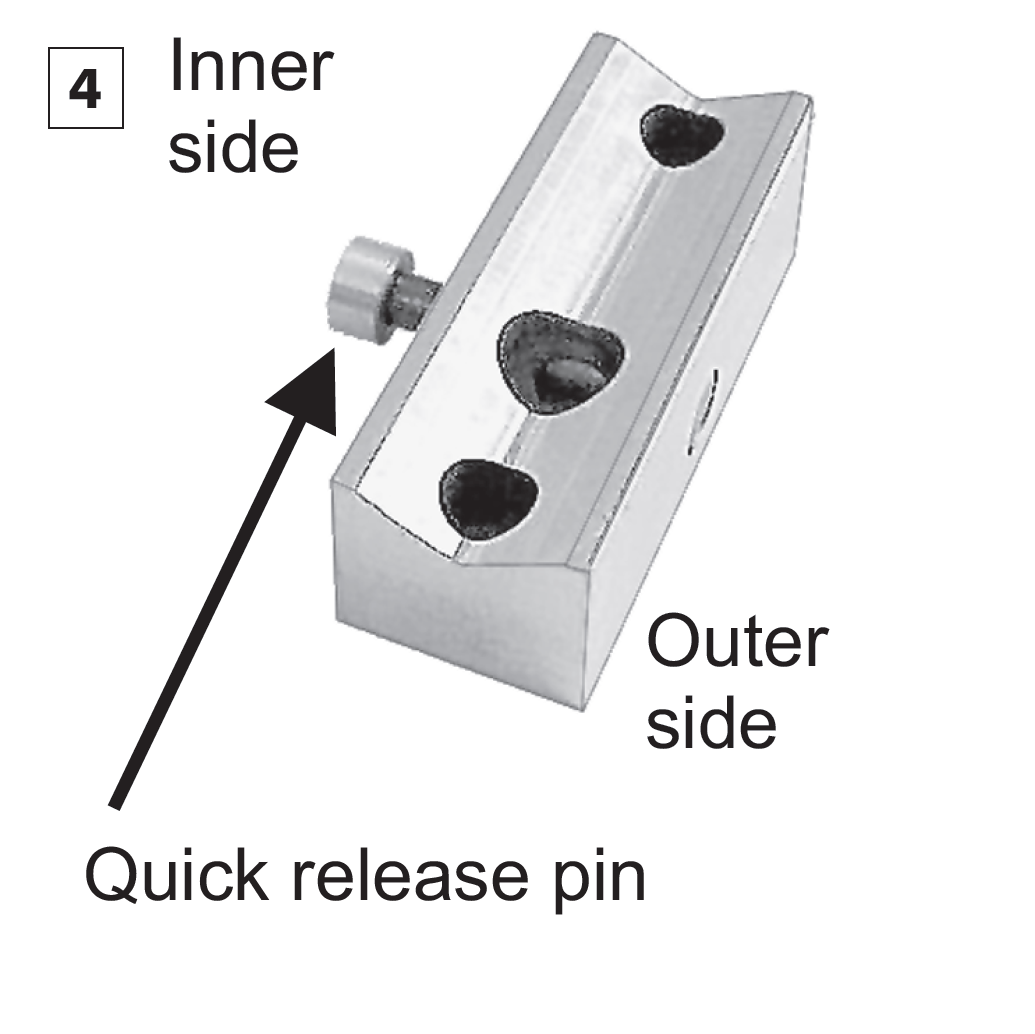
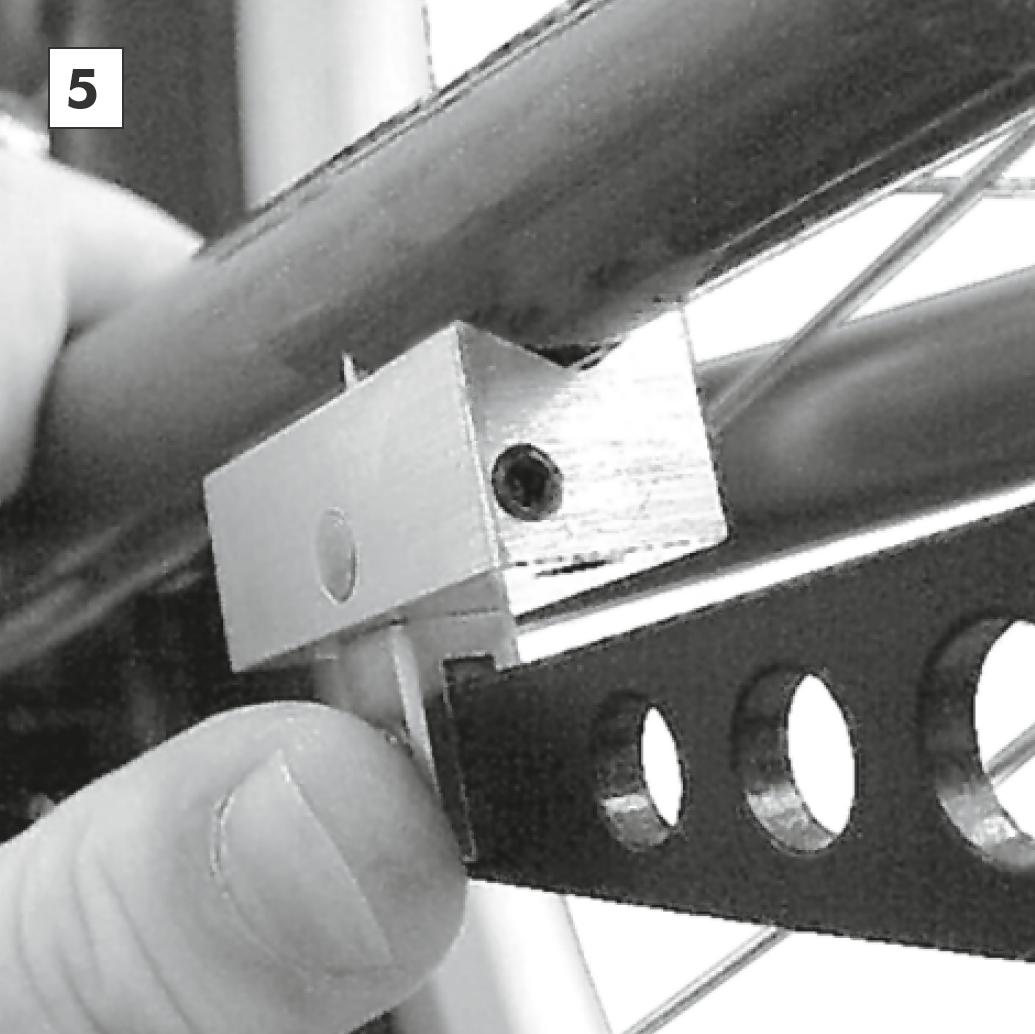
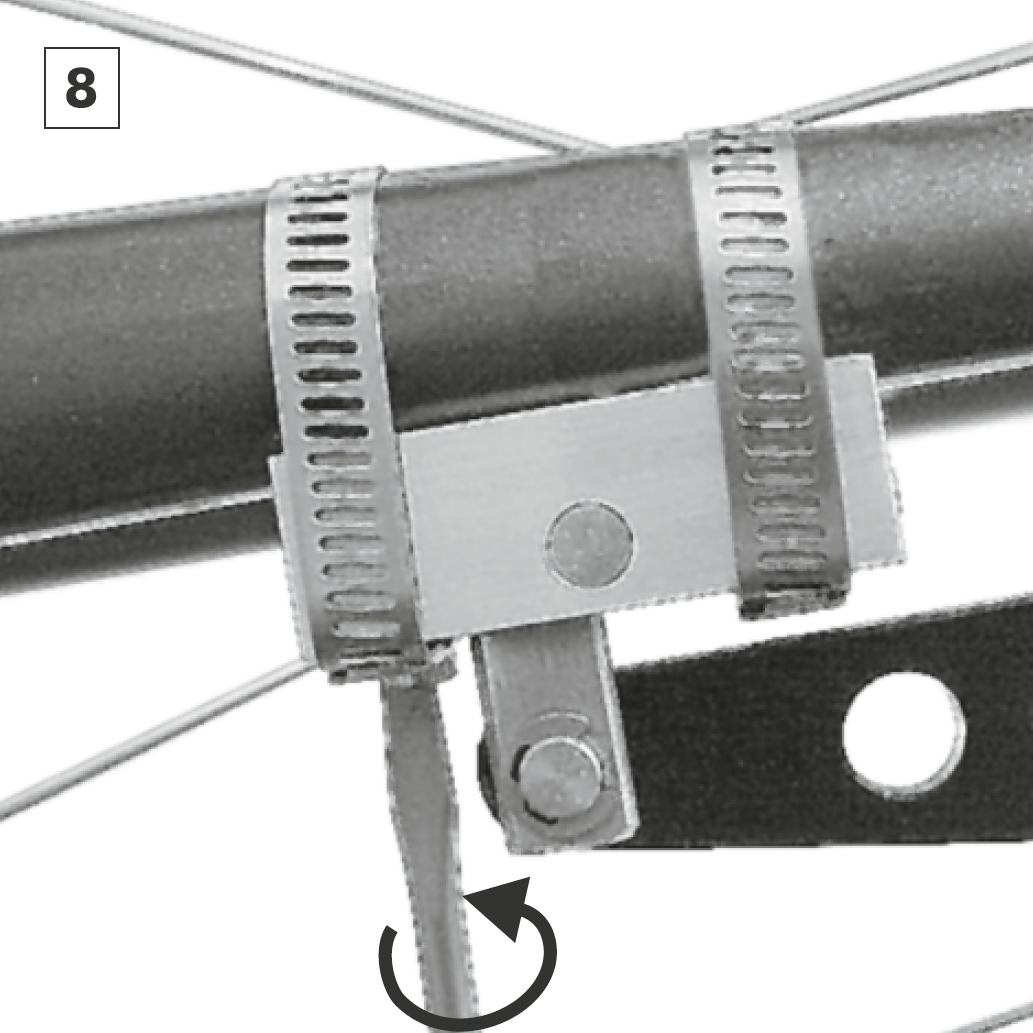
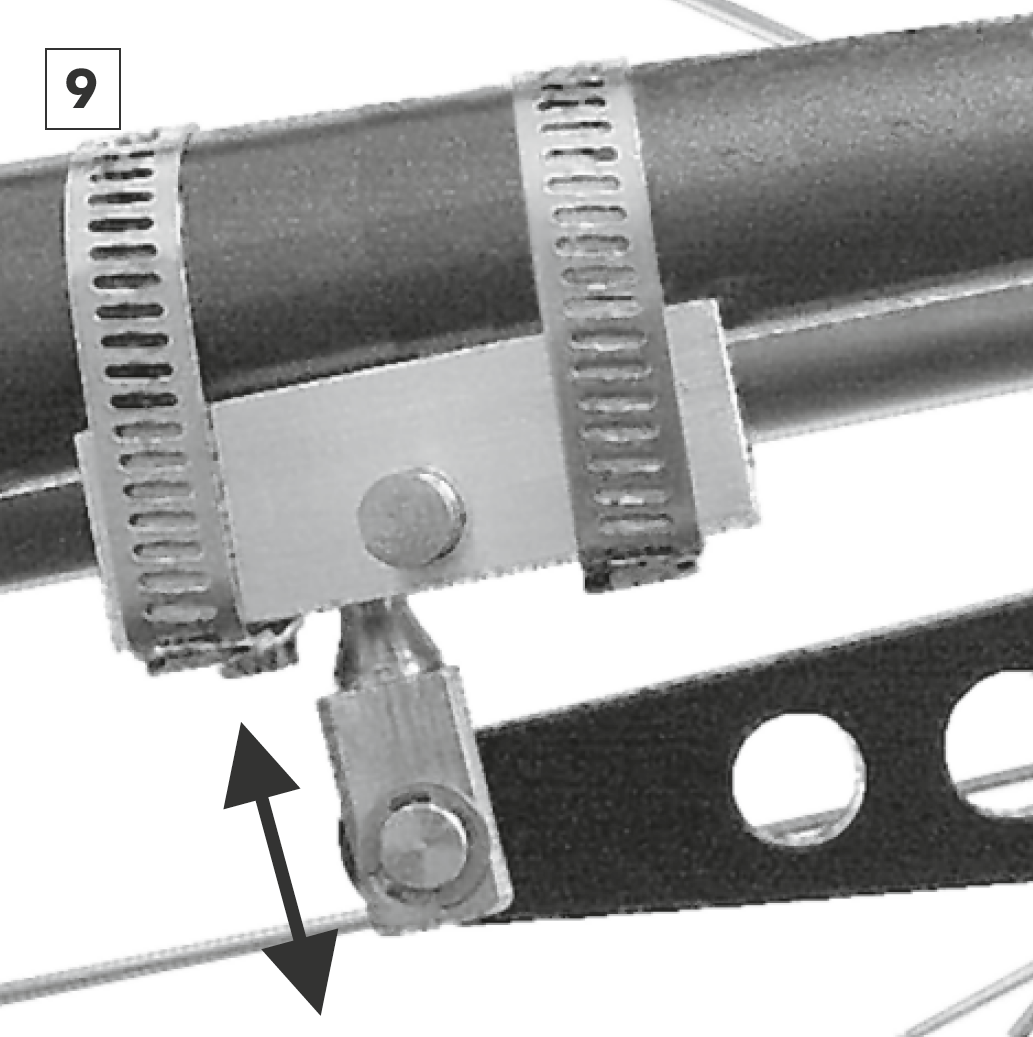
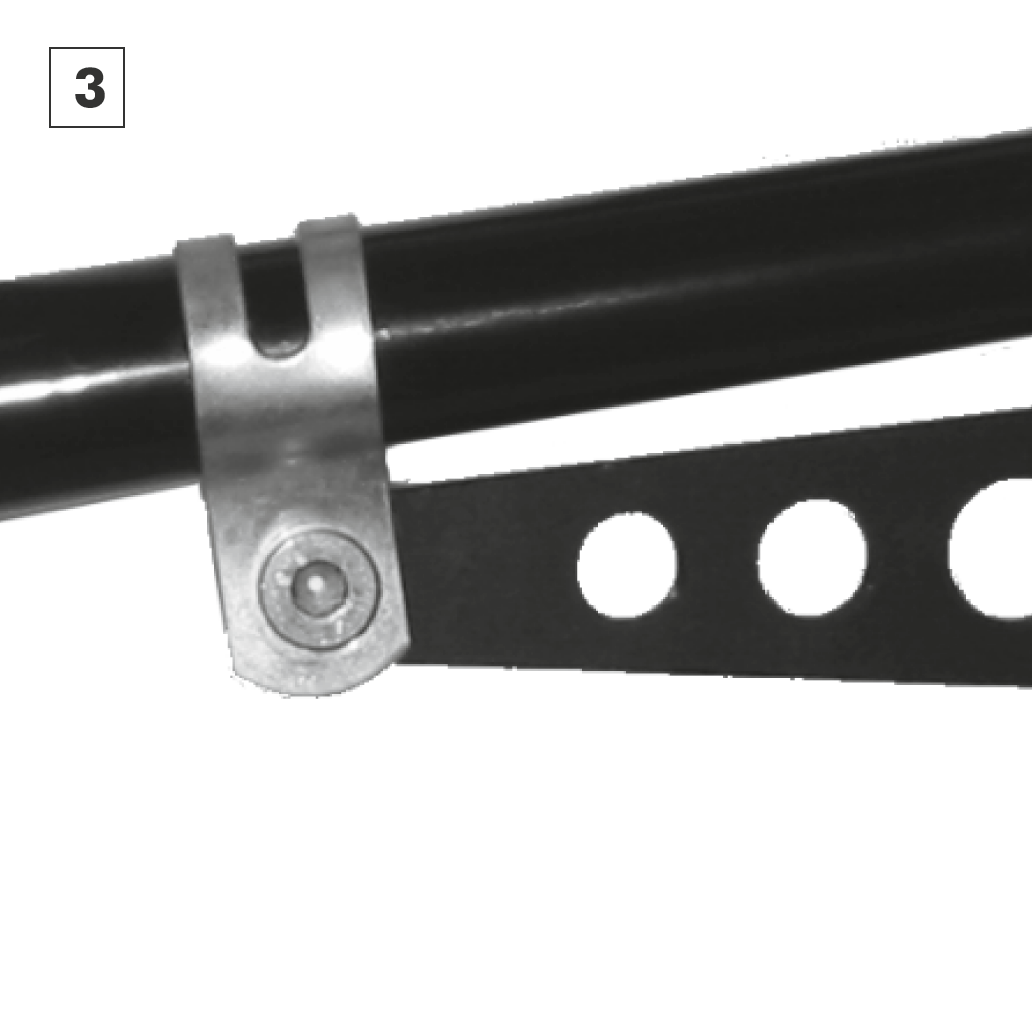
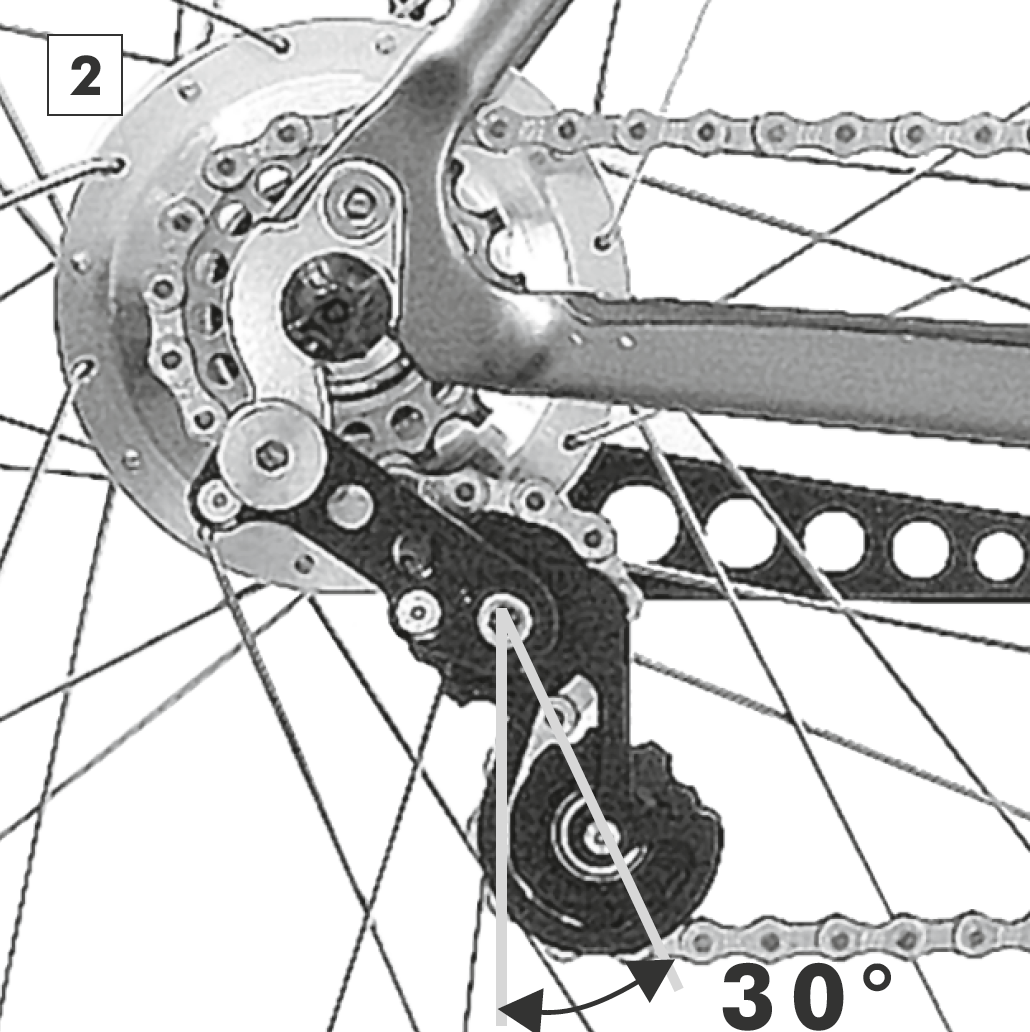
Push the long torque arm with the attached quick release block against the underside of the chain stay. The protuding side of the quick release pin must face inwards. With the axle quick release lever closed, check that the quick release block sits directly under the chainstay. If not, bend the torque arm into the correct position.
Long torque arm (TS)
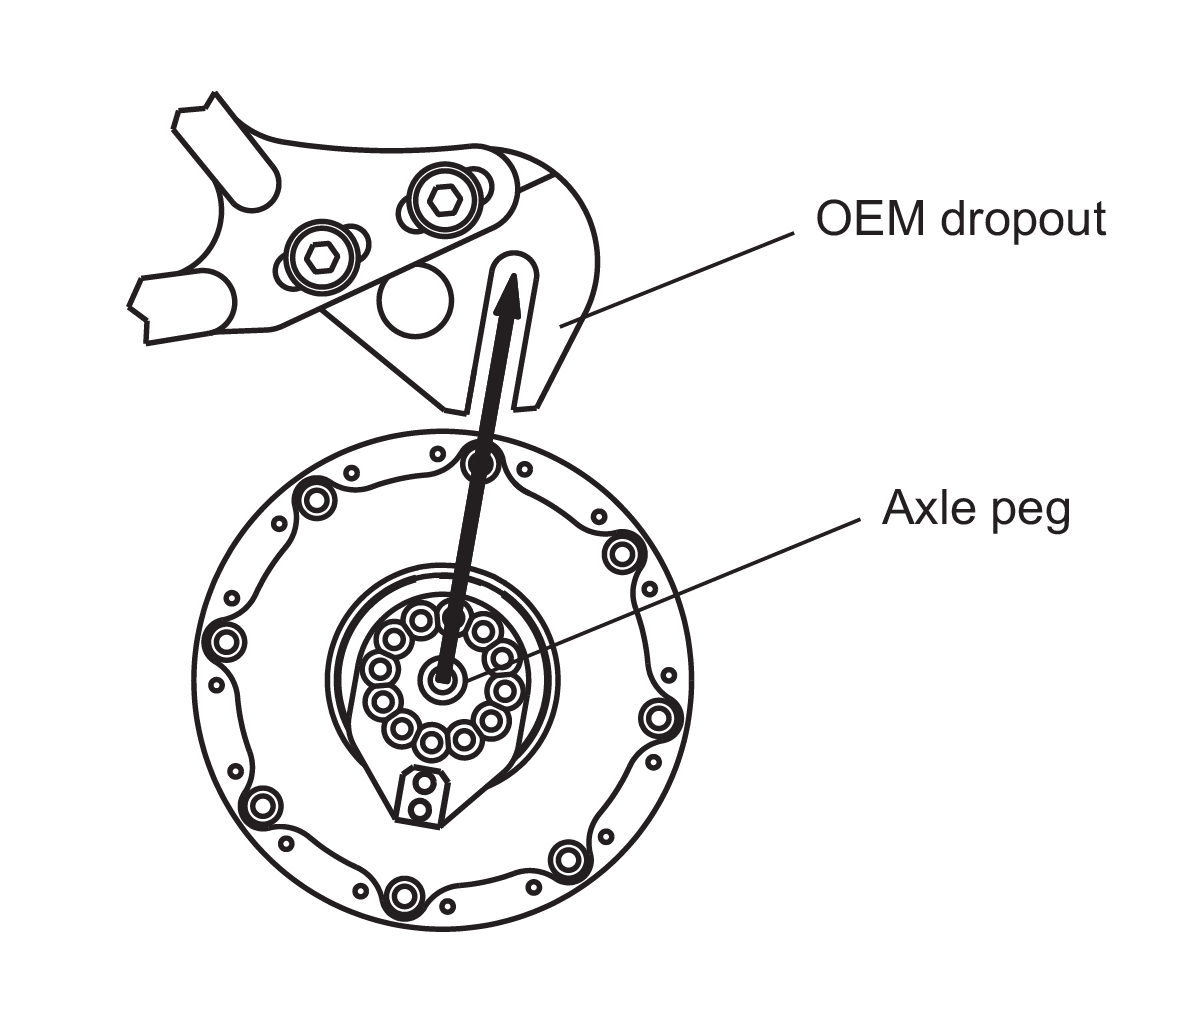
Mounting with OEM axle plate
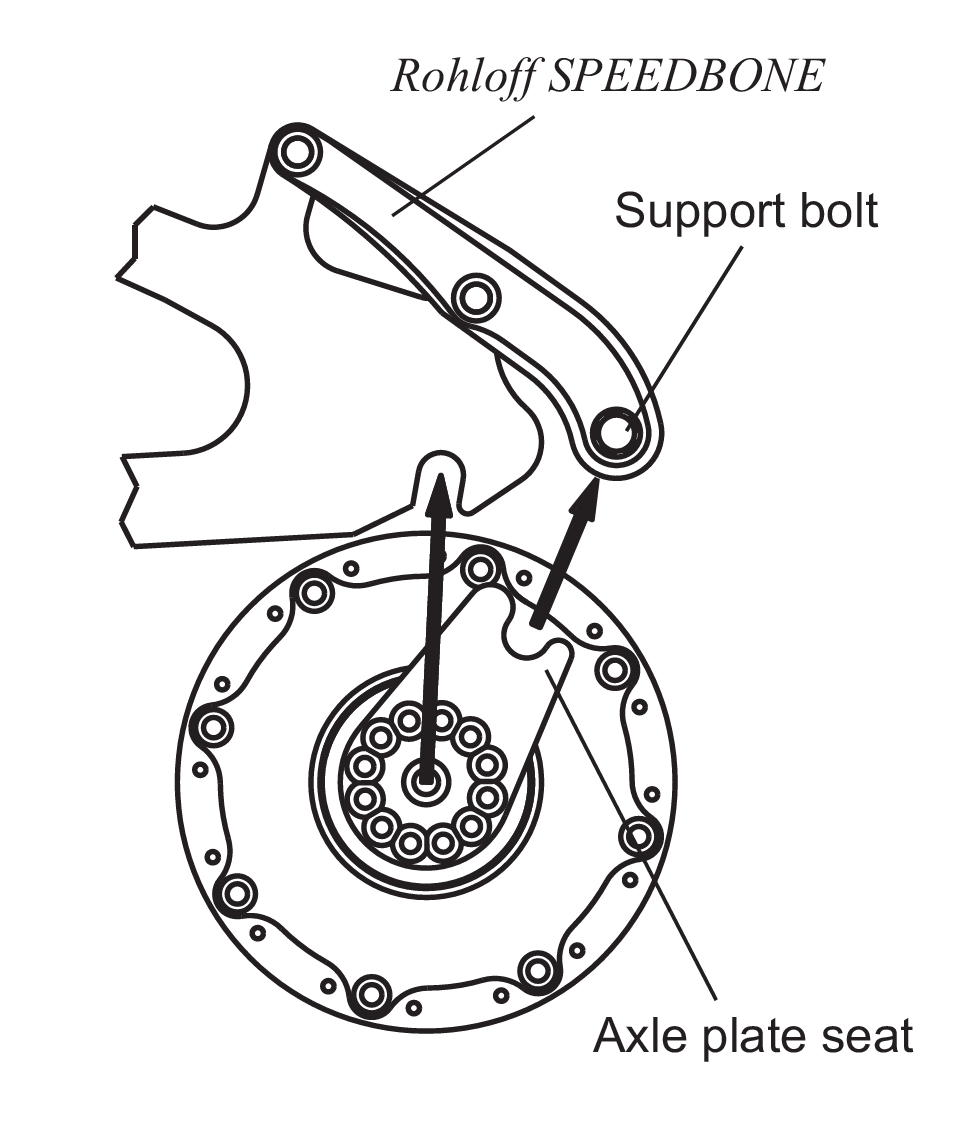
Mounting with OEM2 axle plate
Chain tensioner
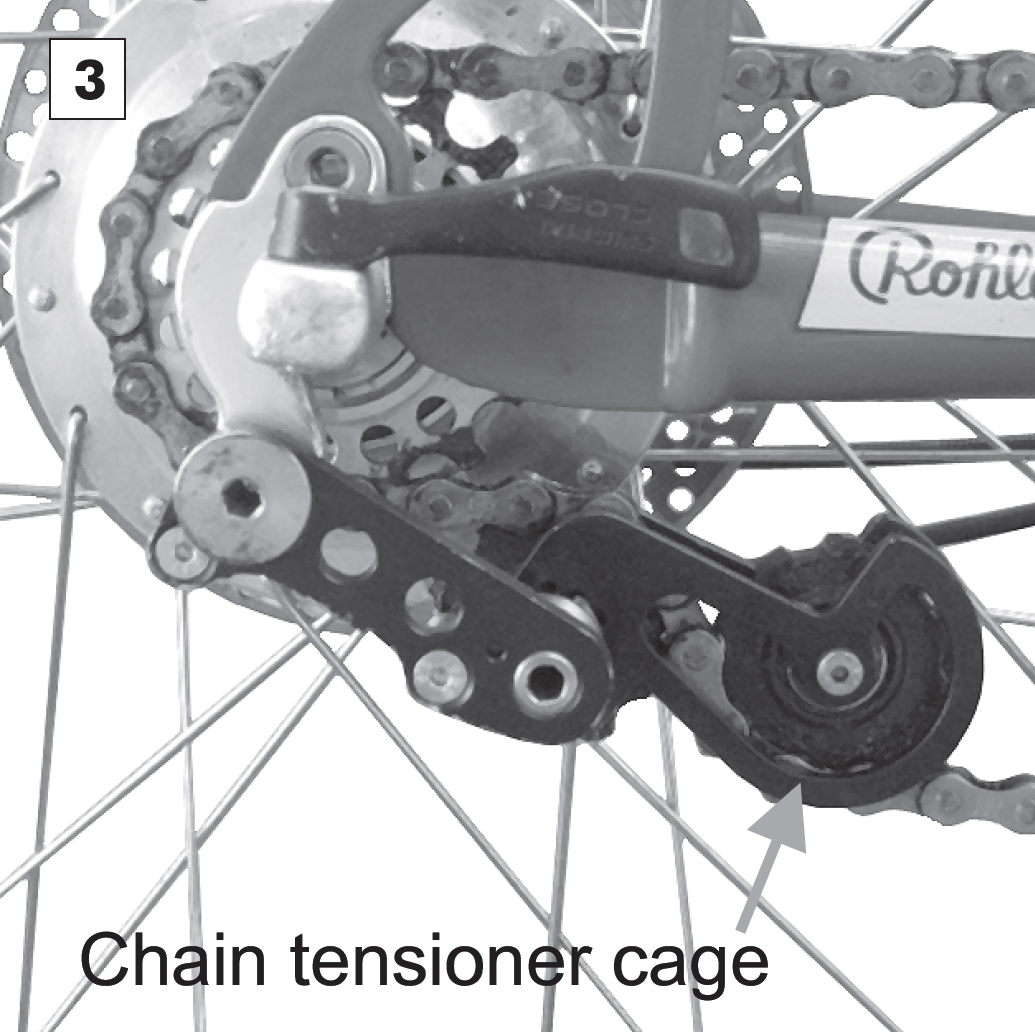
Rohloff chain tensioner

Mounting with a chain tensioner

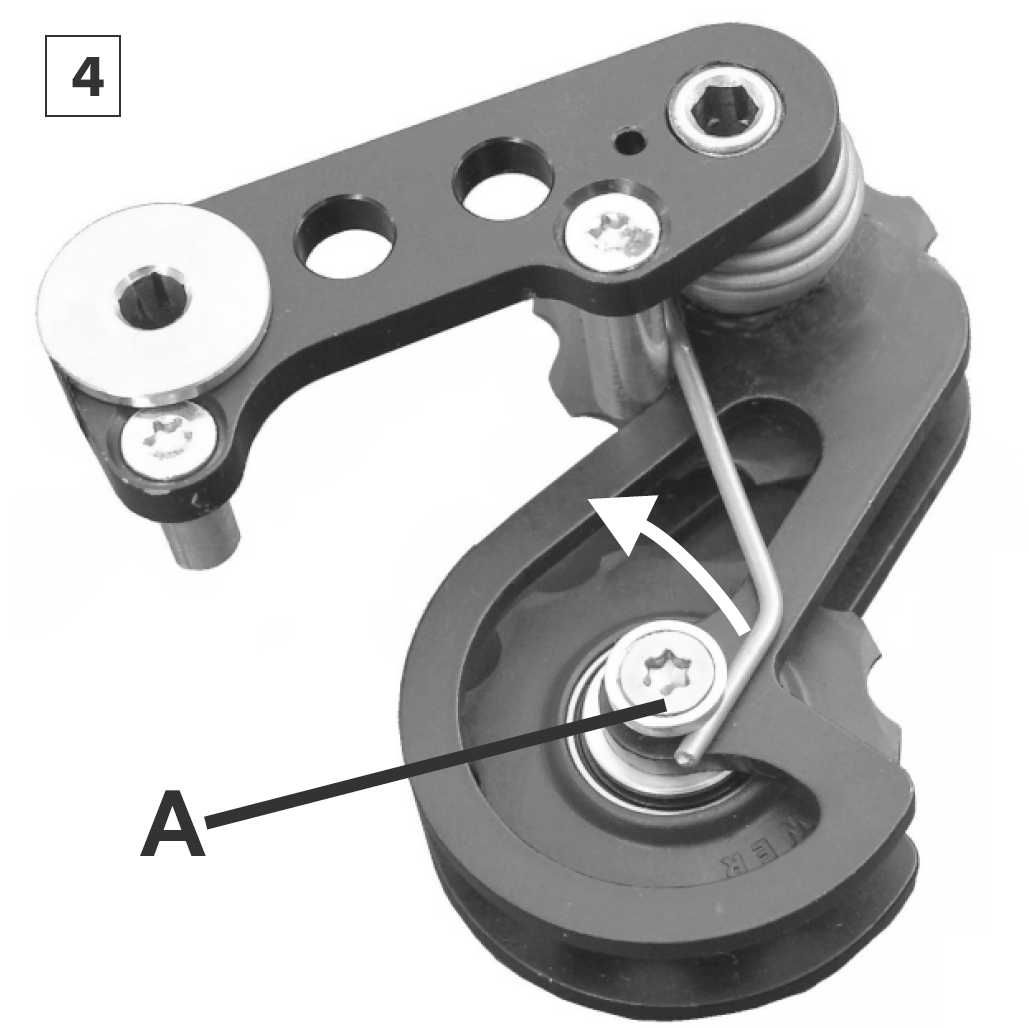
On rear suspension frames, check that the chain tensioner is not overtensioned when the rear triangle moves the full amount of travel. The amount of chain links needed varies, depending on the position of the pivot point of the rear triangle. To check, swing the rear triangle to its end position (e.g. remove the rear shock). If the lower jockey wheel is higher than the upper jockey wheel, or if the chain tensioner cage is against the chain stay, then the chain must be lengthened.
Mounting without a chain tensioner
To mount a new chain, the distance between the bottom bracket and the axle must be set to the minimum.
Place the chain over the chainring and the sprocket. Remove the required amount of chain links, so that the chain is at the minimum possible length. Join the chain together following the manufacturers instructions.
Tension the chain by moving the wheel/bottom bracket until the chain no longer sags. This tension should be regularly checked and if needed, appropriately adjusted.
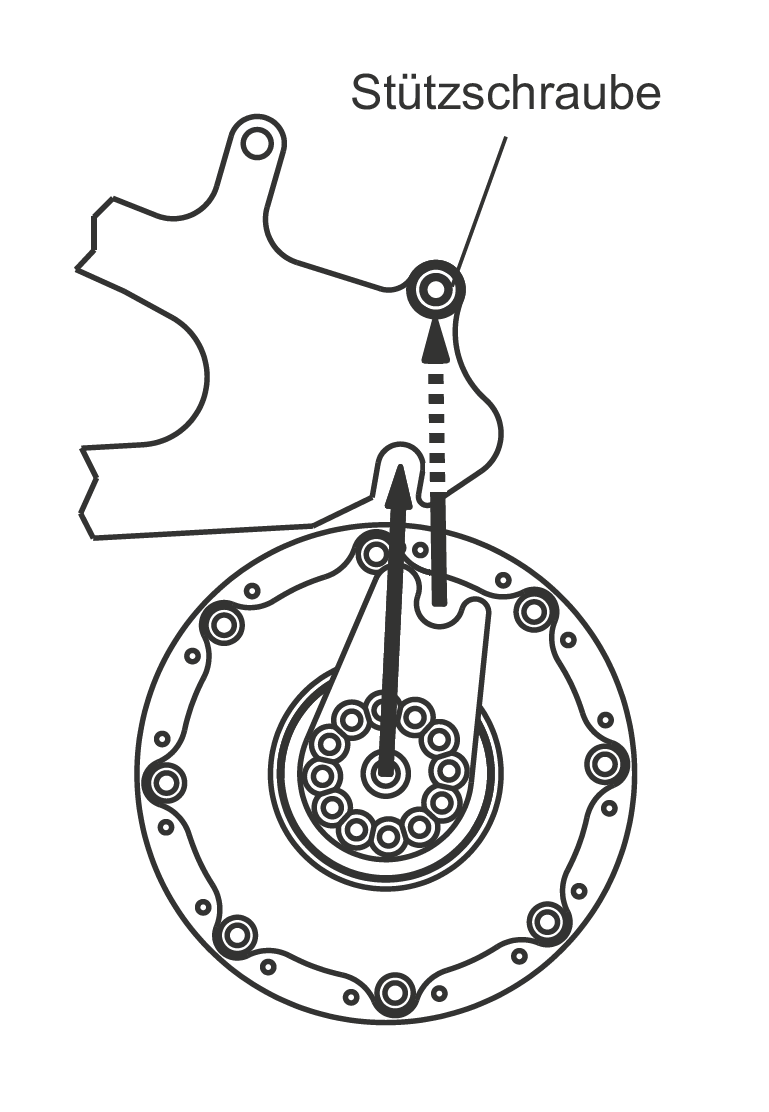
Rohloff DH chain tensioner (accessory for downhill)
The Rohloff DH chain tensioner (Art. #8245) is specially designed for downhill use. It has a tension capacity of 10 chain links. In contrast to the regular Rohloff chain tensioner, it has a shorter swing arm that is restricted from moving. This feature ensures that the upper jockey wheel runs very close to the sprocket. This forced guide guarantees a positive run of the chain onto the sprocket even under extreme riding conditions. To remove the wheel, the chain tensioner mounting bolt must be loosened.
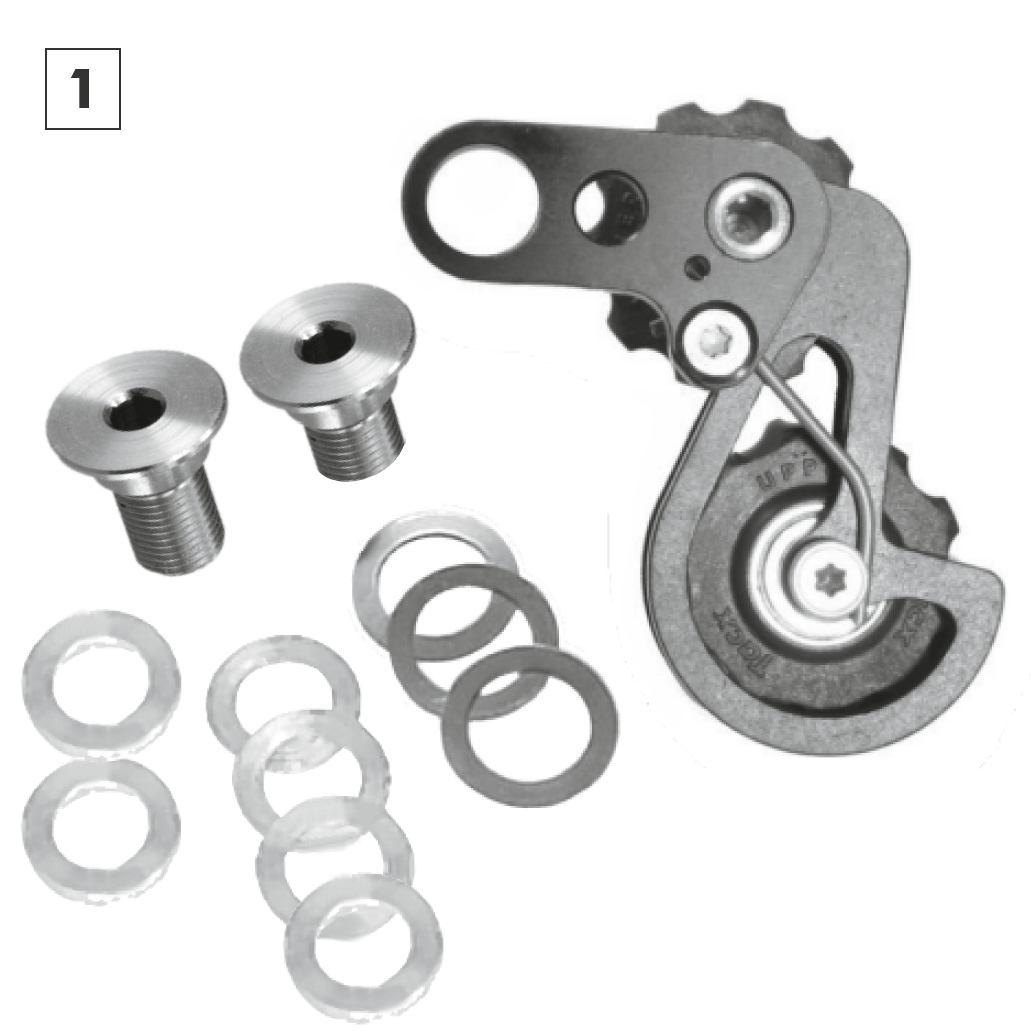

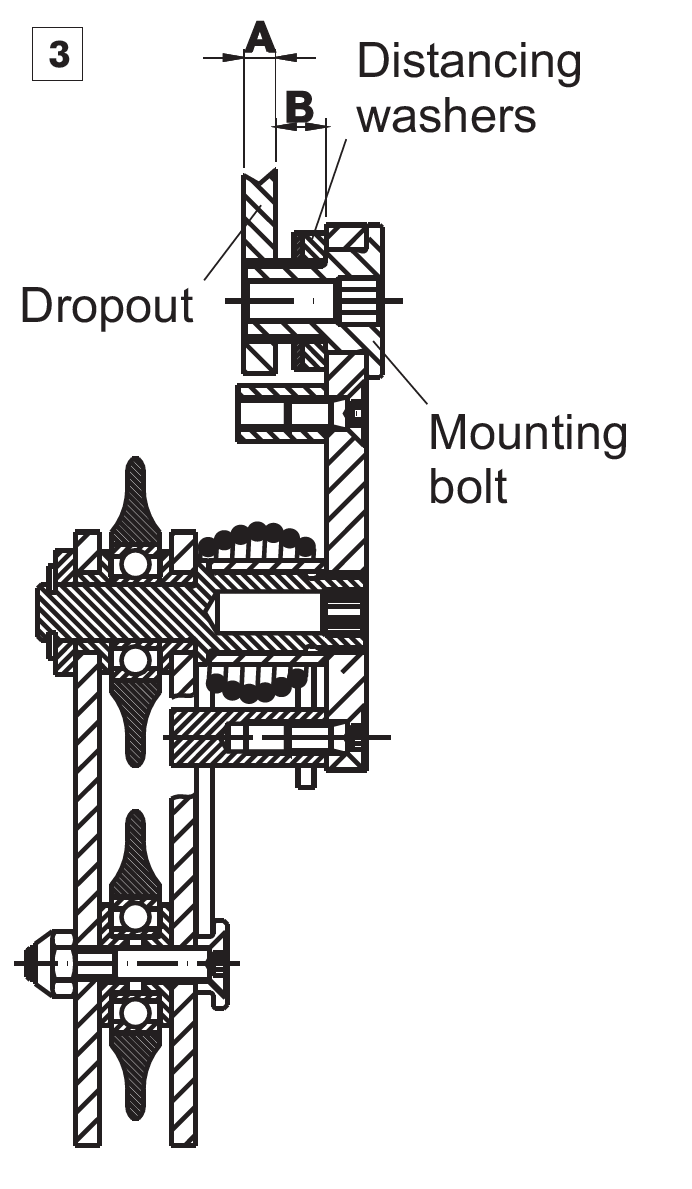
Place all three 0.2mm or one 0.5mm distancing washers between the outer side of the swing arm and the mounting bolt. This will guarantee that the swing arm is prevented from moving. Mount the Rohloff DH chain tensioner with the correct amount of distancing washers, so that the jockey wheels sit directly underneath the sprocket for the correct chain line.
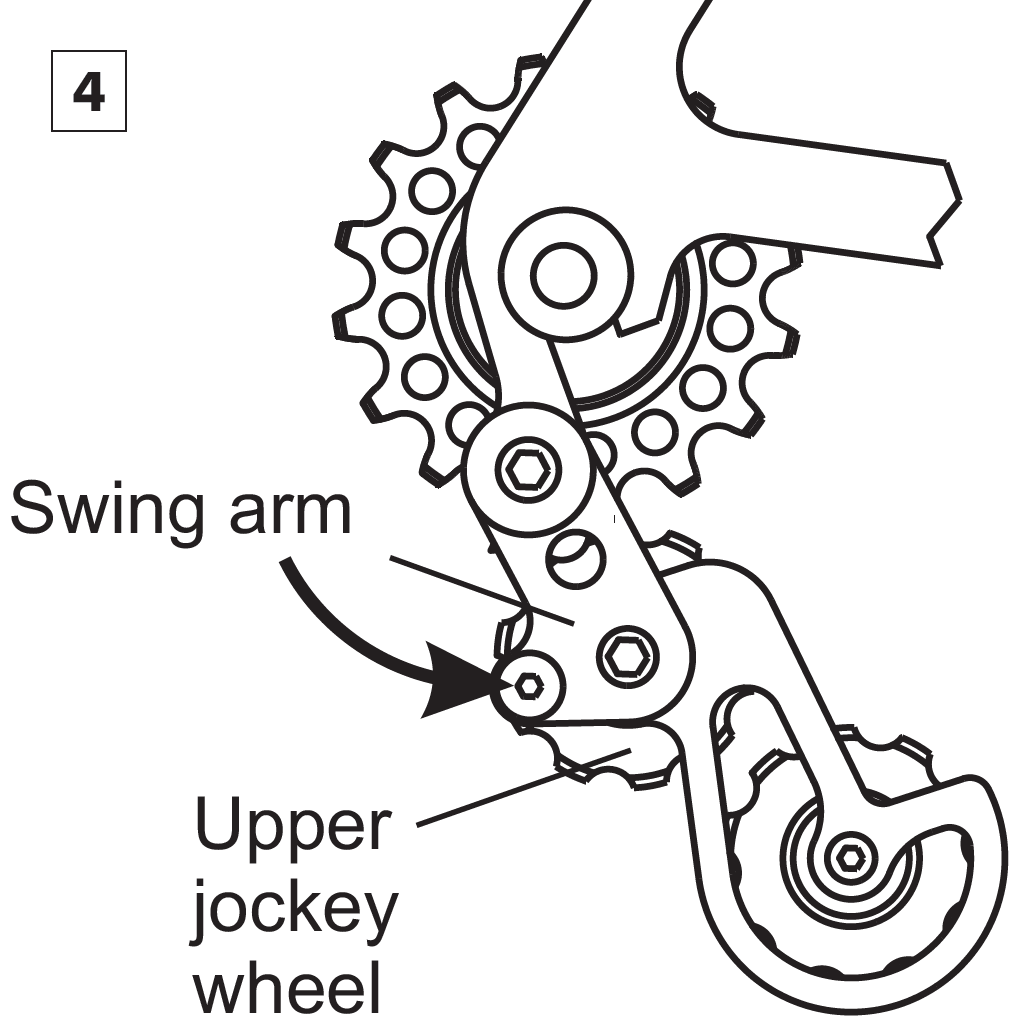
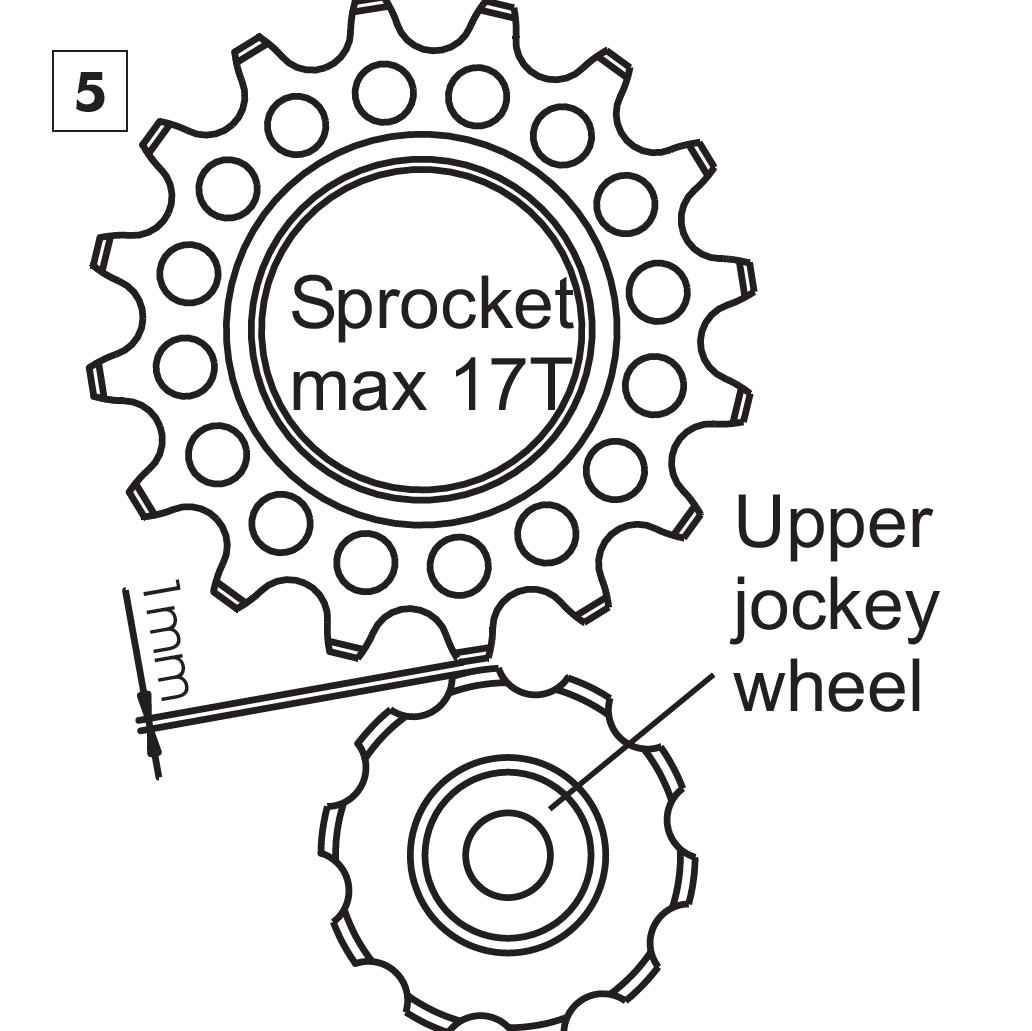
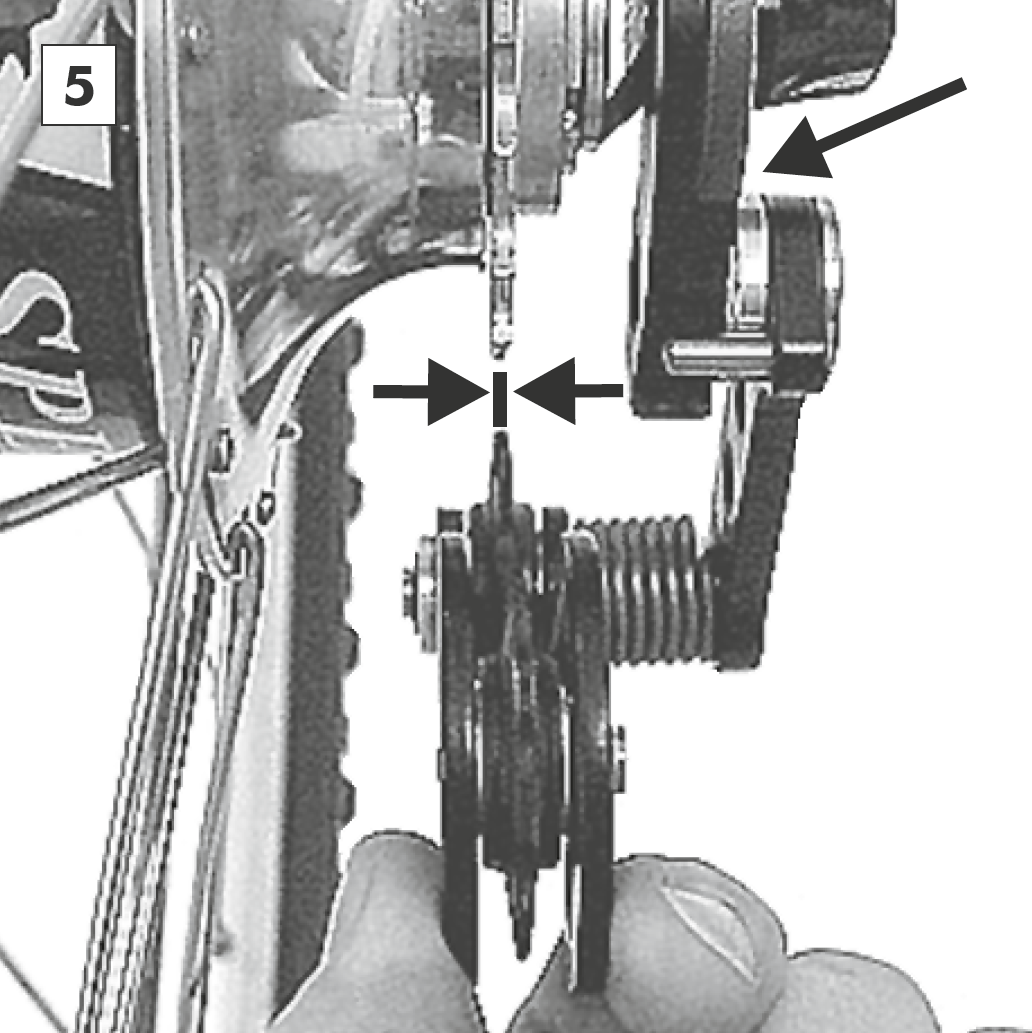
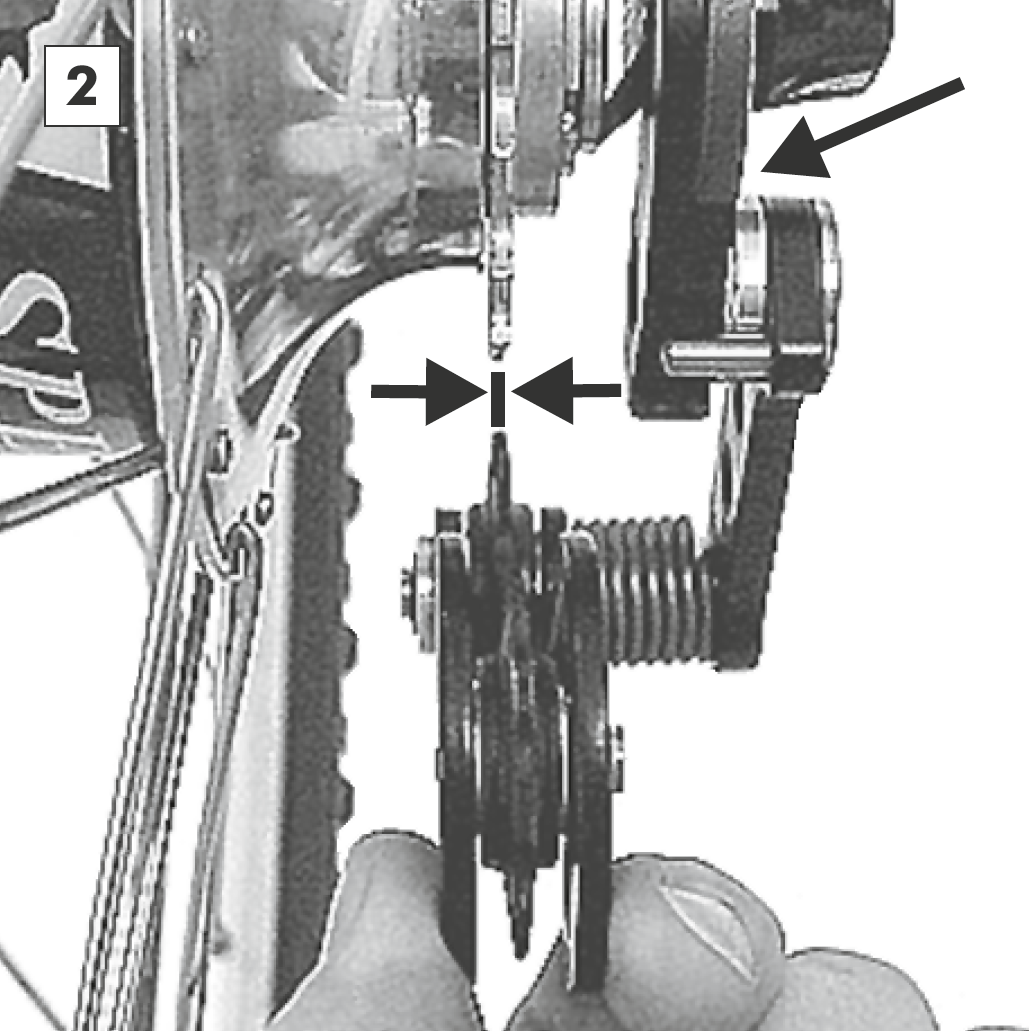
Adjust the position of the upper jockey wheel. To do this, loosen the mounting bolt and swing the chain tensioner in the arrowed direction until there is approx. 1mm space between the jockey wheel and the sprocket. Retighten the mounting bolt (5mm Allen wrench, tightening torque 8Nm/70in.lbs.).
On dropouts thinner than 7mm, the use of the 13 tooth sprocket or splined sprockets (chainline 57mm) will require the use of the longer mounting bolt. This is available separately (Art.#8255).
Chain guide
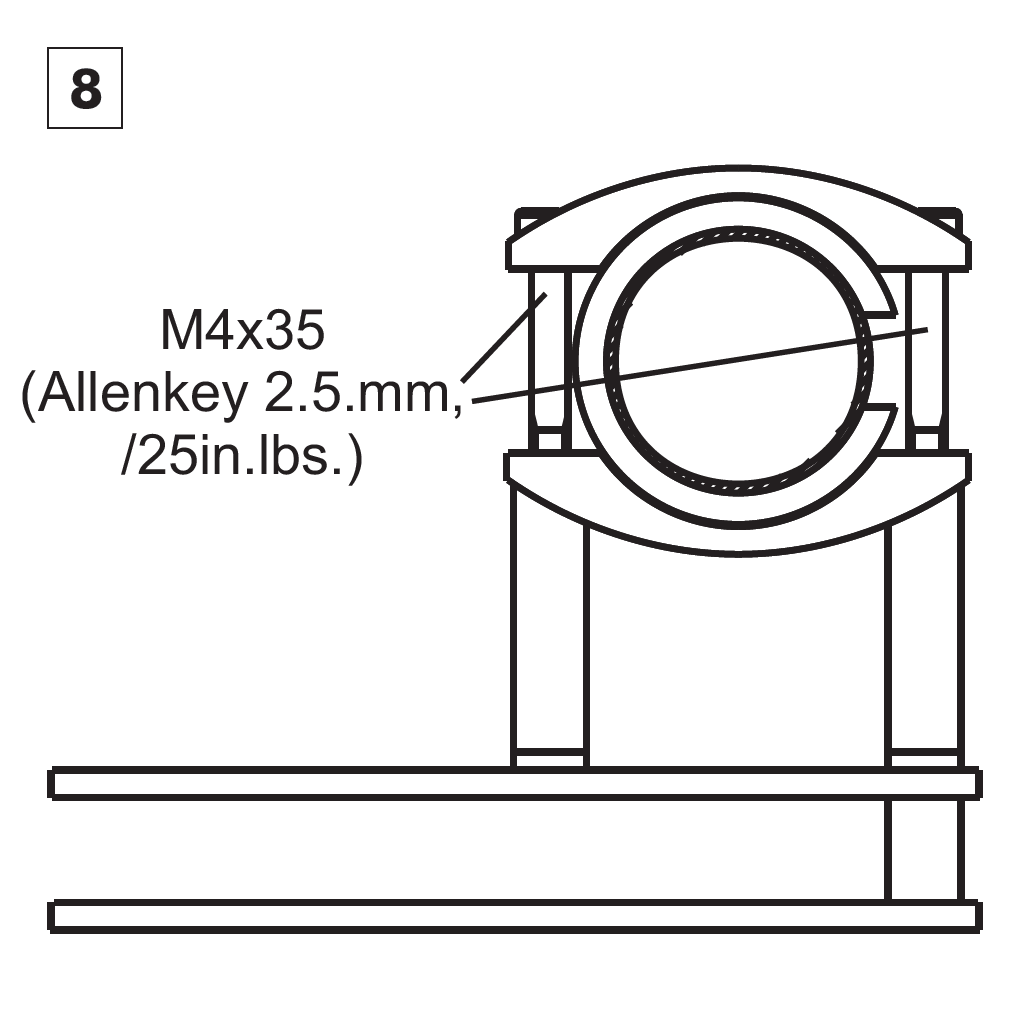
Rohloff chain guide CC
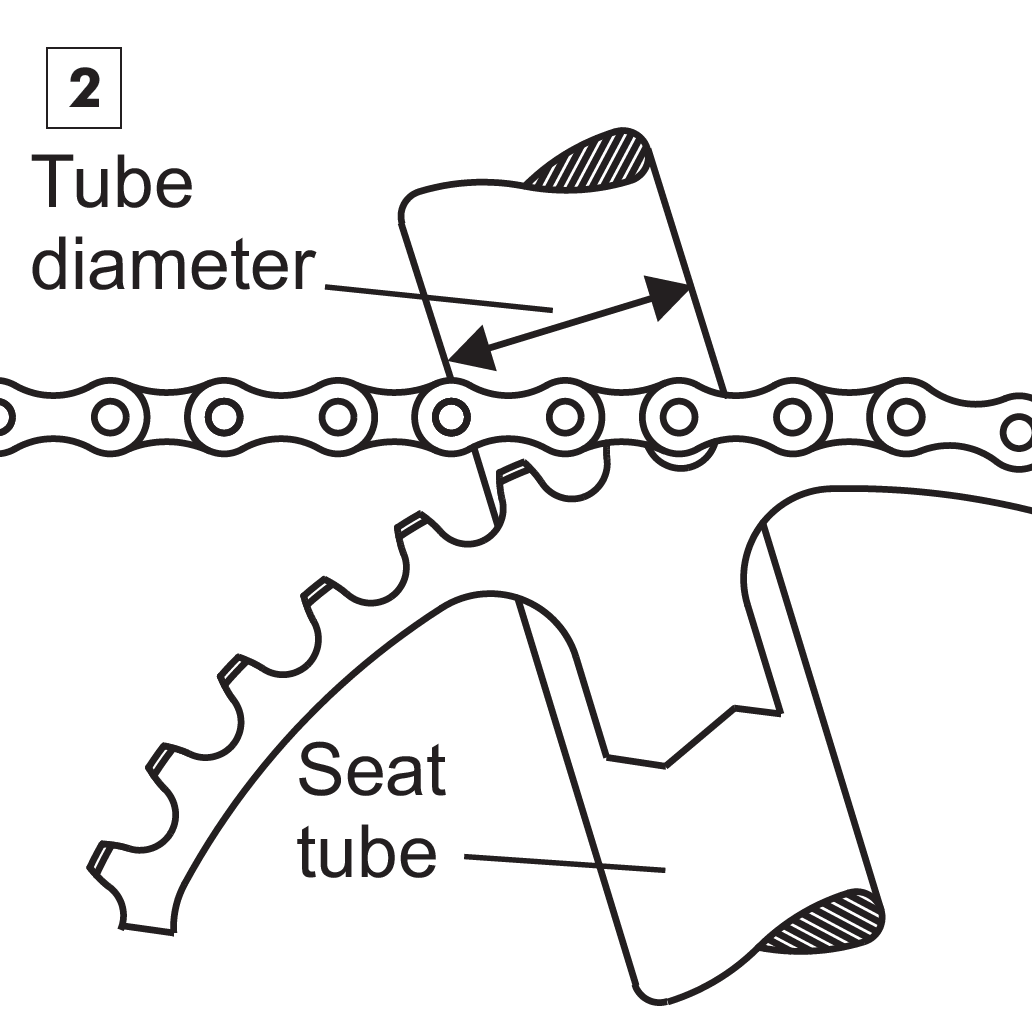
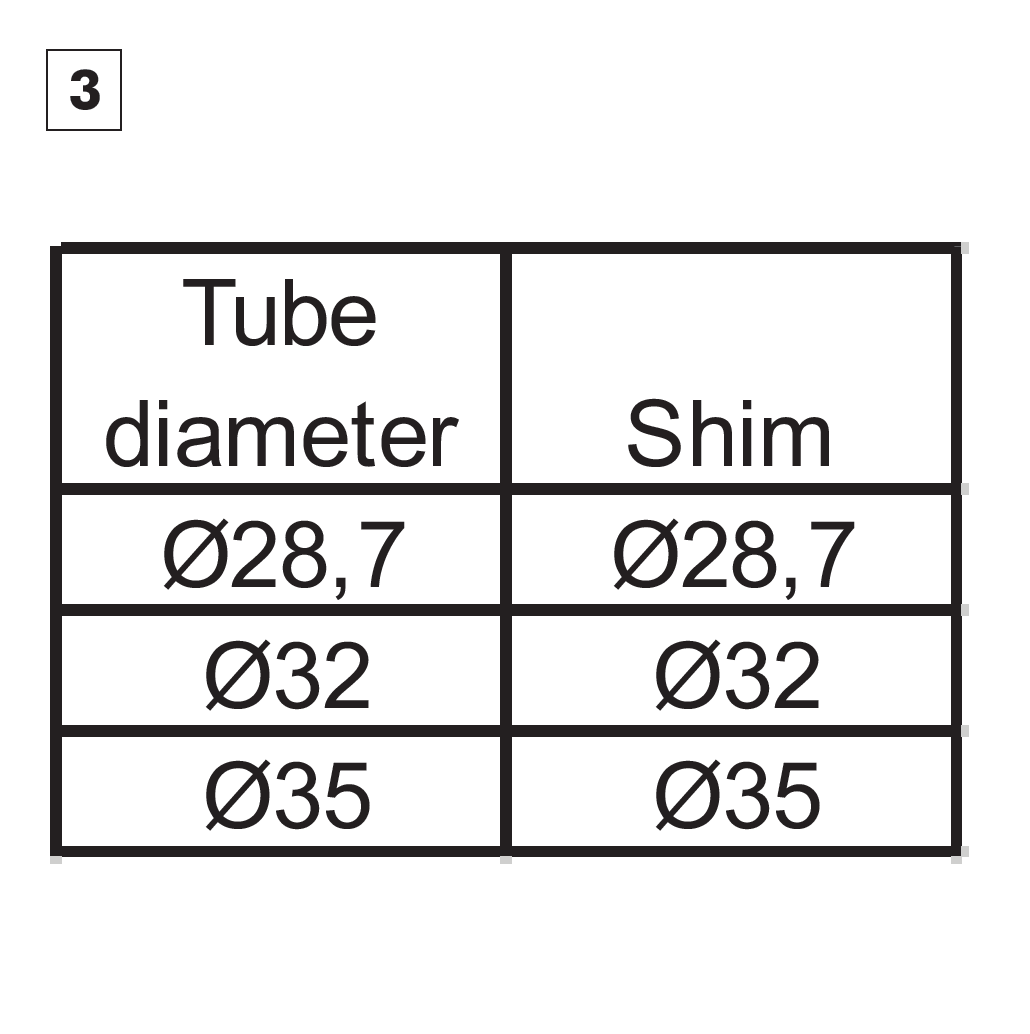
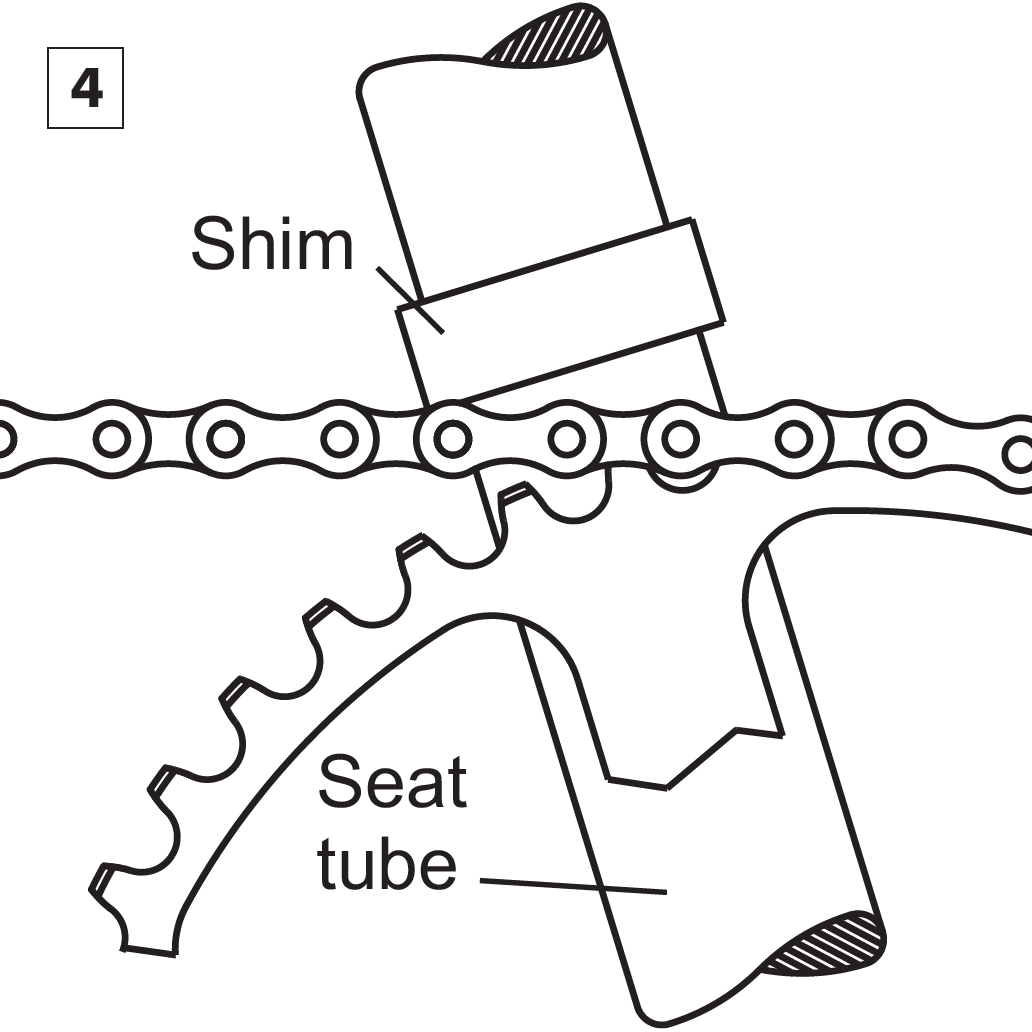
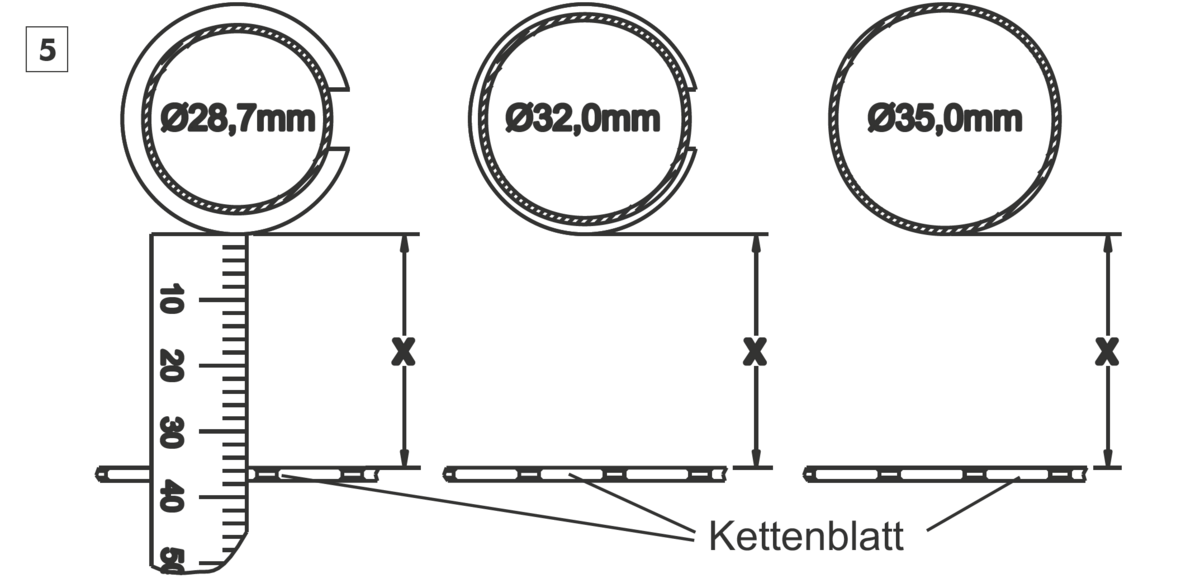
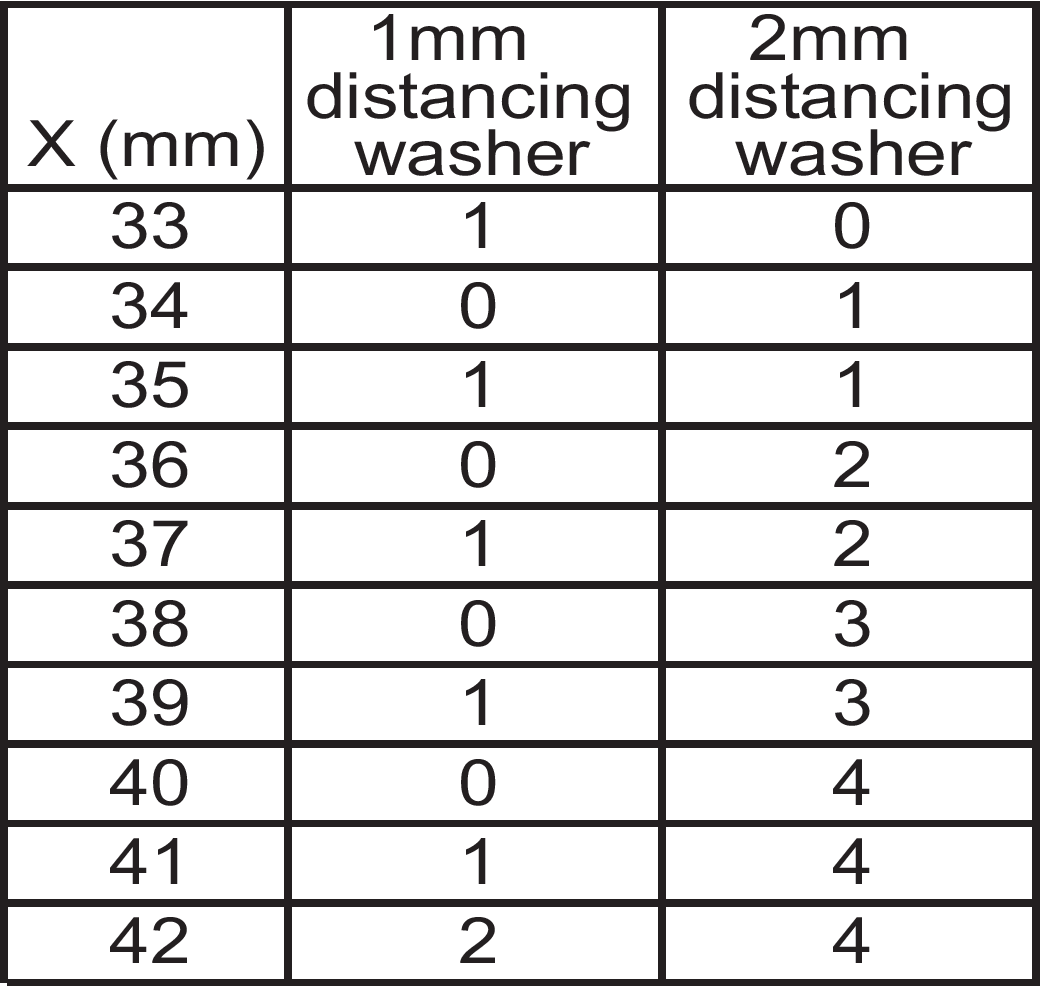
The distance X between the seat tube with shim and the inner side of the chainring determines how many distancing washers will need to be fitted. This is shown in the table.
Example: X=35mm. A 1mm distancing washer and a 2mm distancing washer are needed between the front and the rear threaded bushes and the left guide plate.
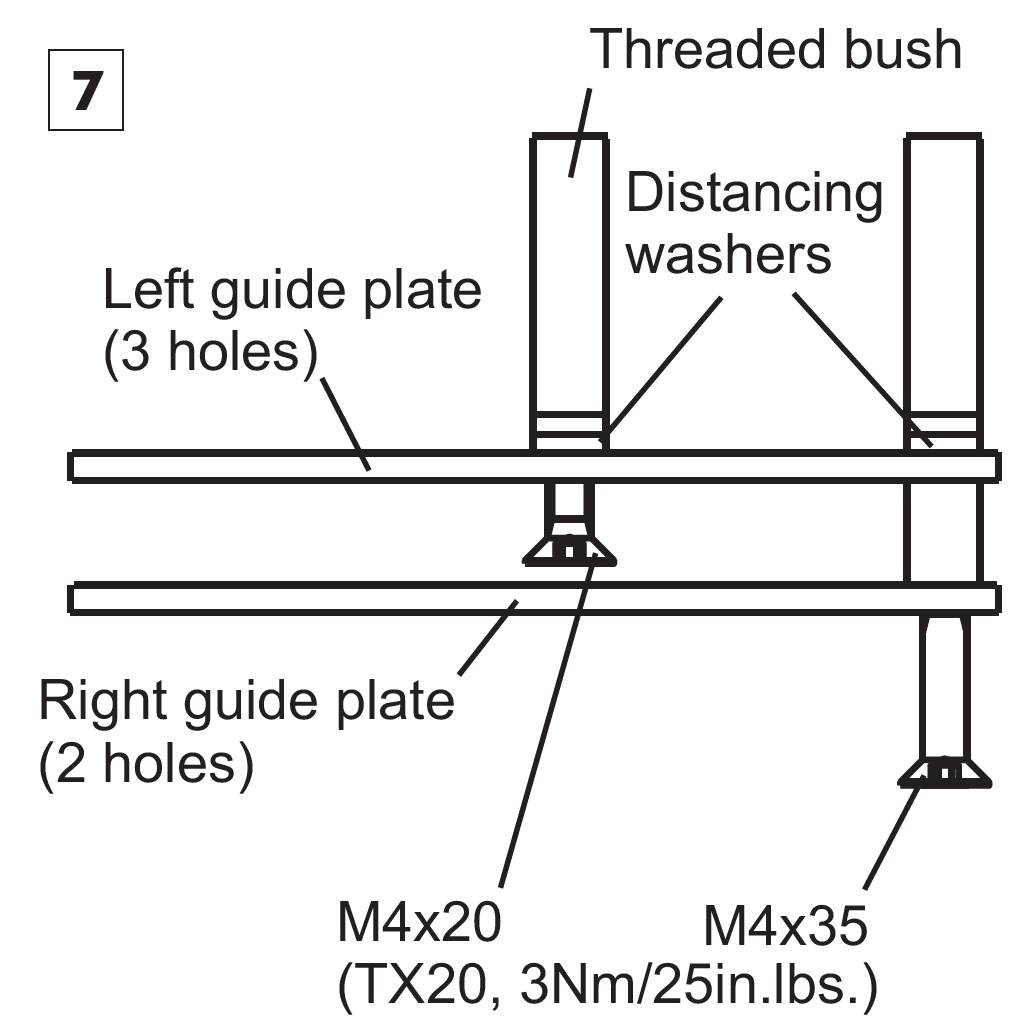

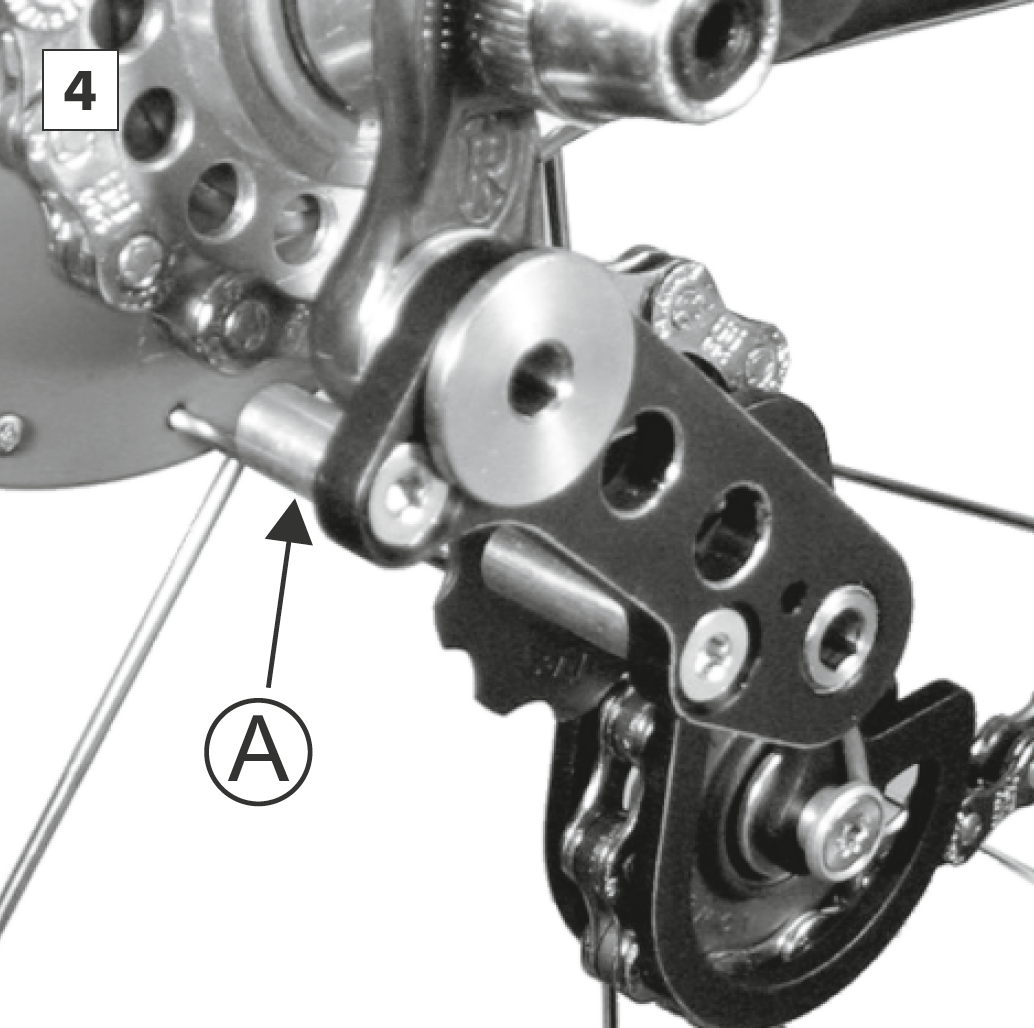
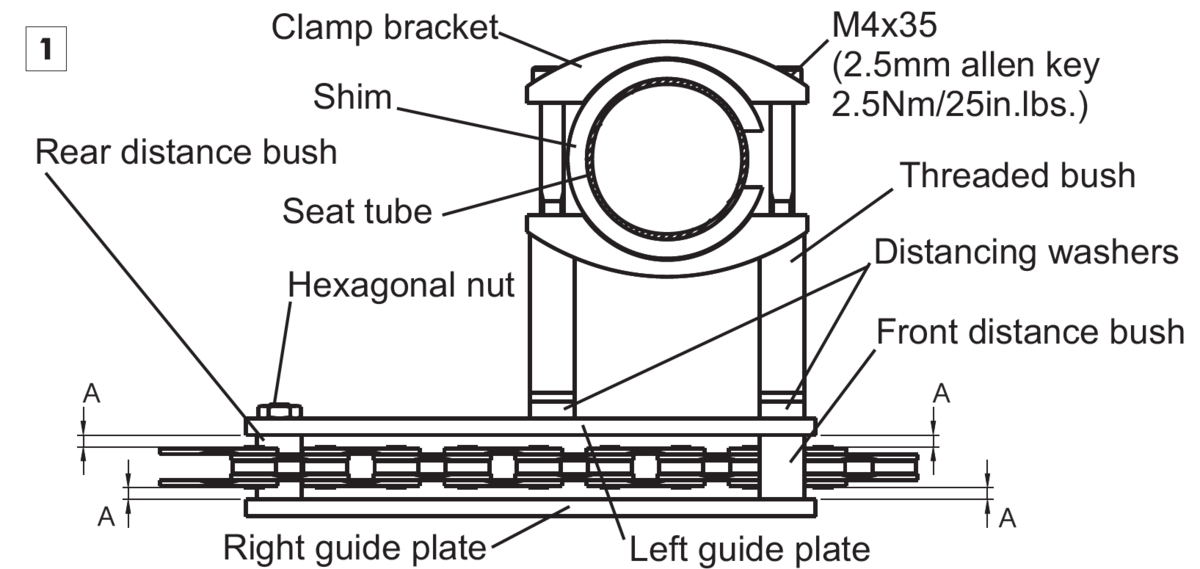
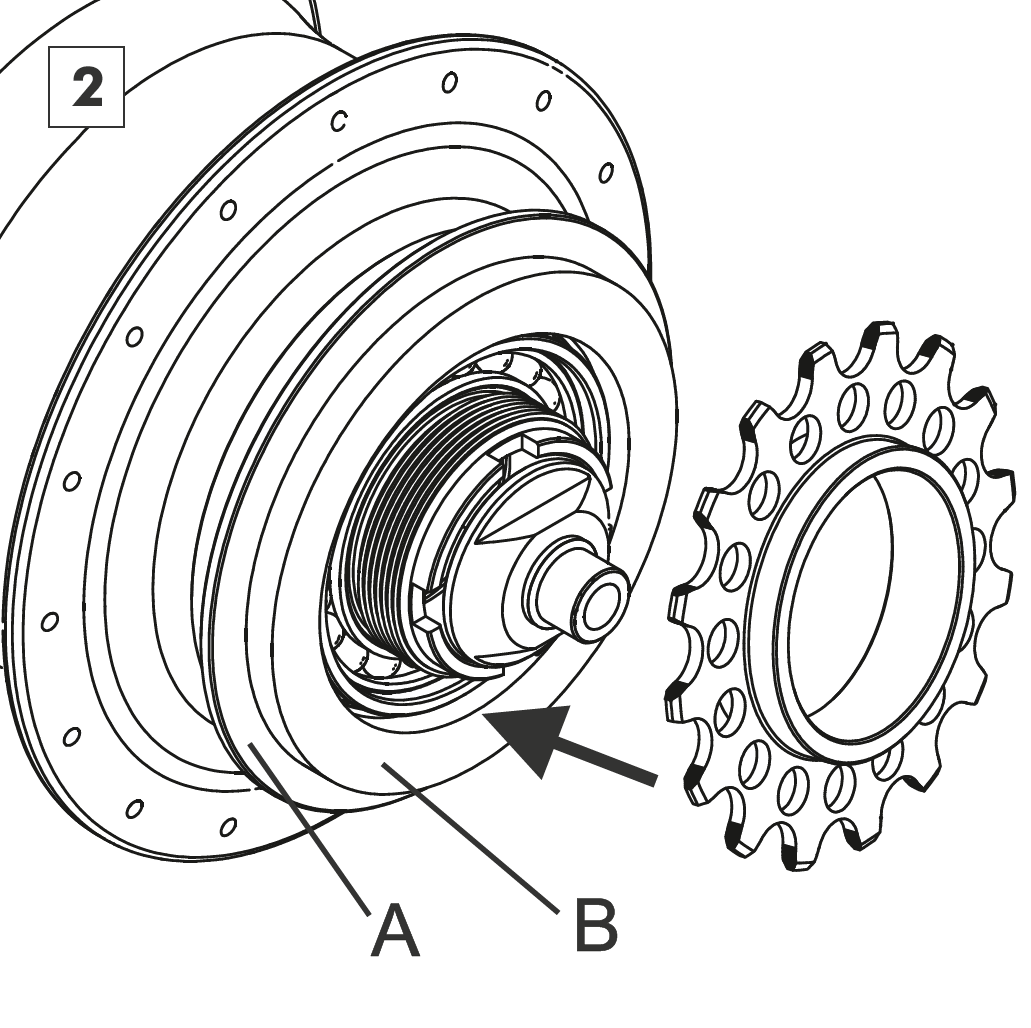
The rear distance bush (arrowed) can now be mounted using a lightly greased countersunk head bolt (M4x20 - Torx TX20, tightening torque 3Nm/25in.lbs.) and secured into the hexagonal nut below the upper chain run. Slide the chain guide down the seat tube until there is approx. 5mm between the rear distance bush and the teeth of the chainring. Make sure the chain runs parallel and central between the two guide plates (distances A, fig. 1).
Rohloff DH chain guide (accessory for downhill)
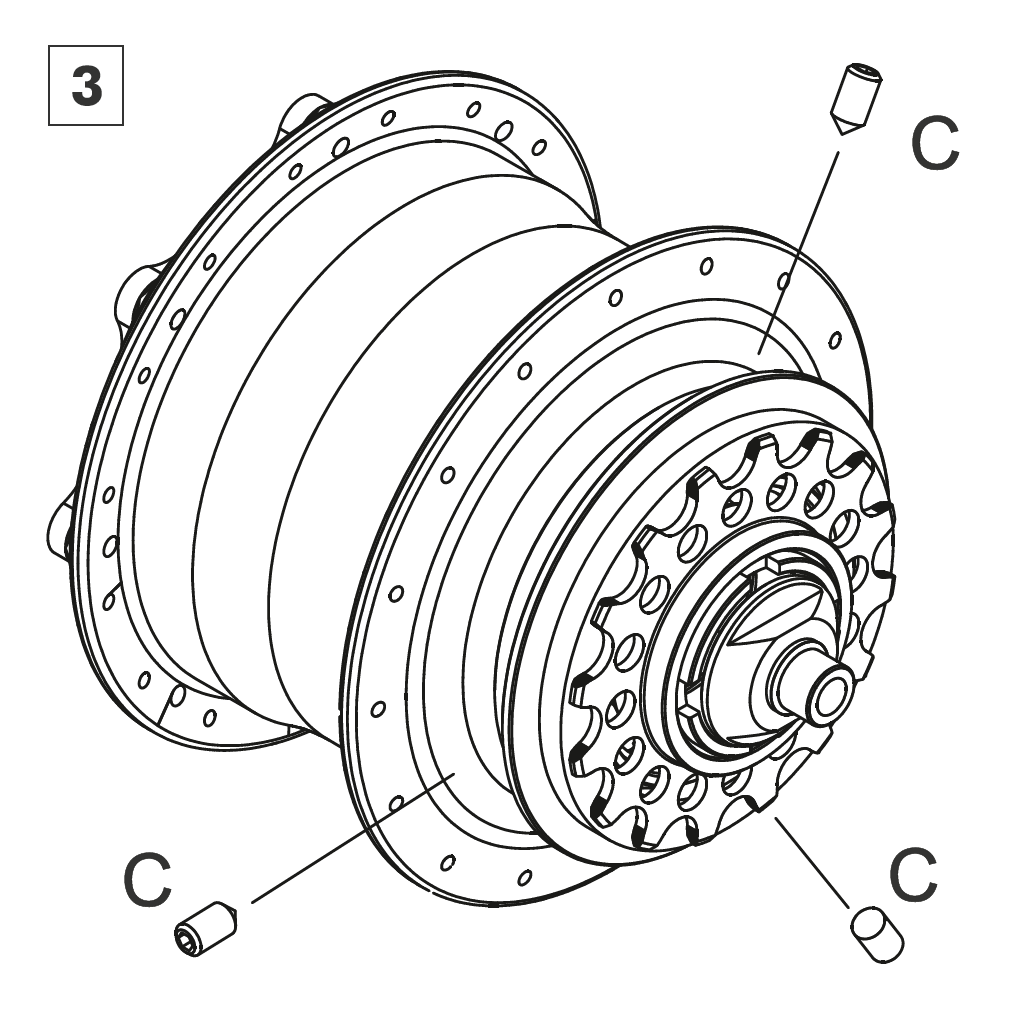
The three grub screws C (M4x8 - 2mm Allen wrench) should be screwed in evenly until they all touch the hub casing. Then tighten up all three screws in rotational order one complete turn at a time until they drill their way into the hub casing itself. During this process, the mounting ring will be trapped between the sprocket and the chain guide.