The Rohloff chain tensioner has been equipped with a modified spring since the end of 2002. Our conversion kit (Art. #8248) can be used to adapt all older Rohloff chain tensioners, so they can make use of this redesigned, improved spring.
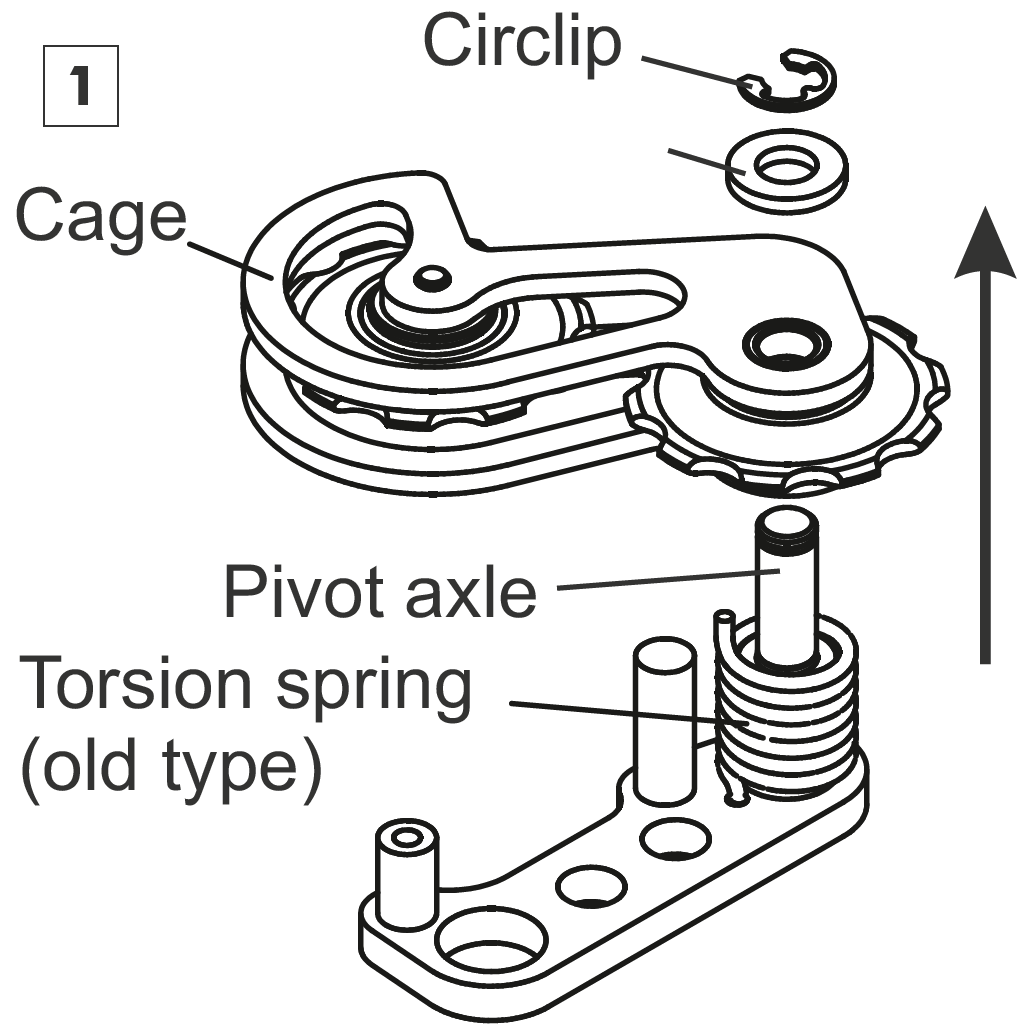
Remove the safety clip from the pivot axle using a flat screwdriver. Do not reuse this clip. Pull the cage and the washer off the pivot axle in the direction of the arrow. Remove the old torsion spring.
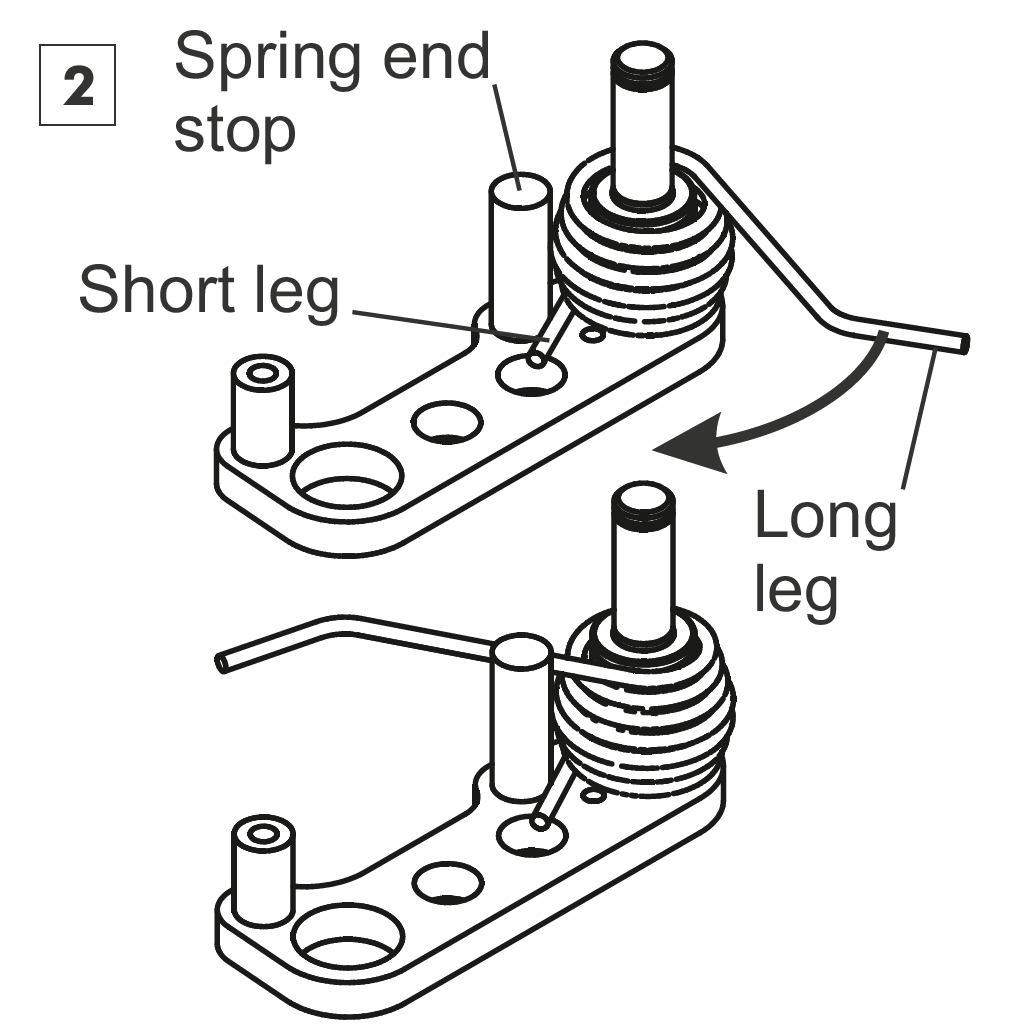
Clean and grease the pivot axle. Mount the new torsion spring over the pivot axle as shown. Turn the torsion spring until its short leg lies against the spring end stop. Hold the torsion spring in its position on the pivot axle whilst swinging the long leg over the spring end stop.
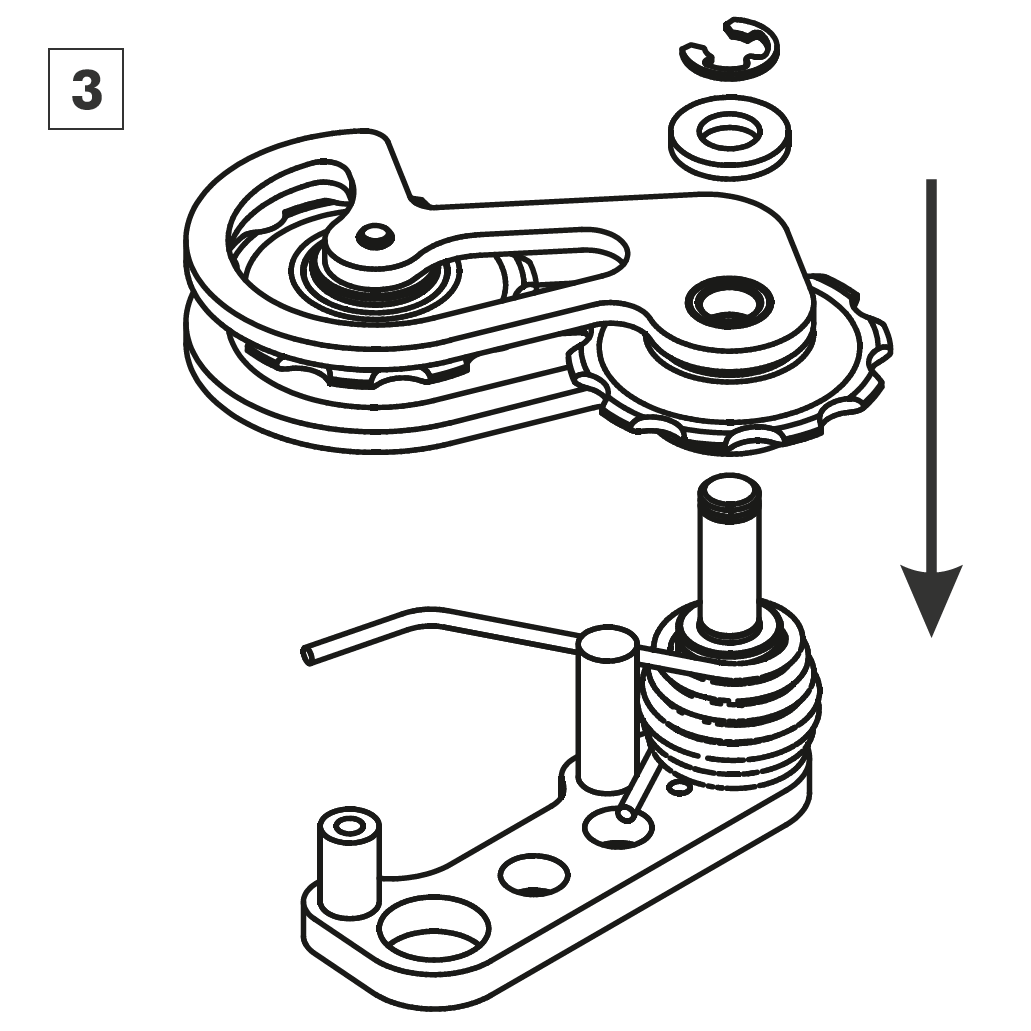
Push the cage completely onto the pivot axle. Replace the washer and fit the new safety clip into position.
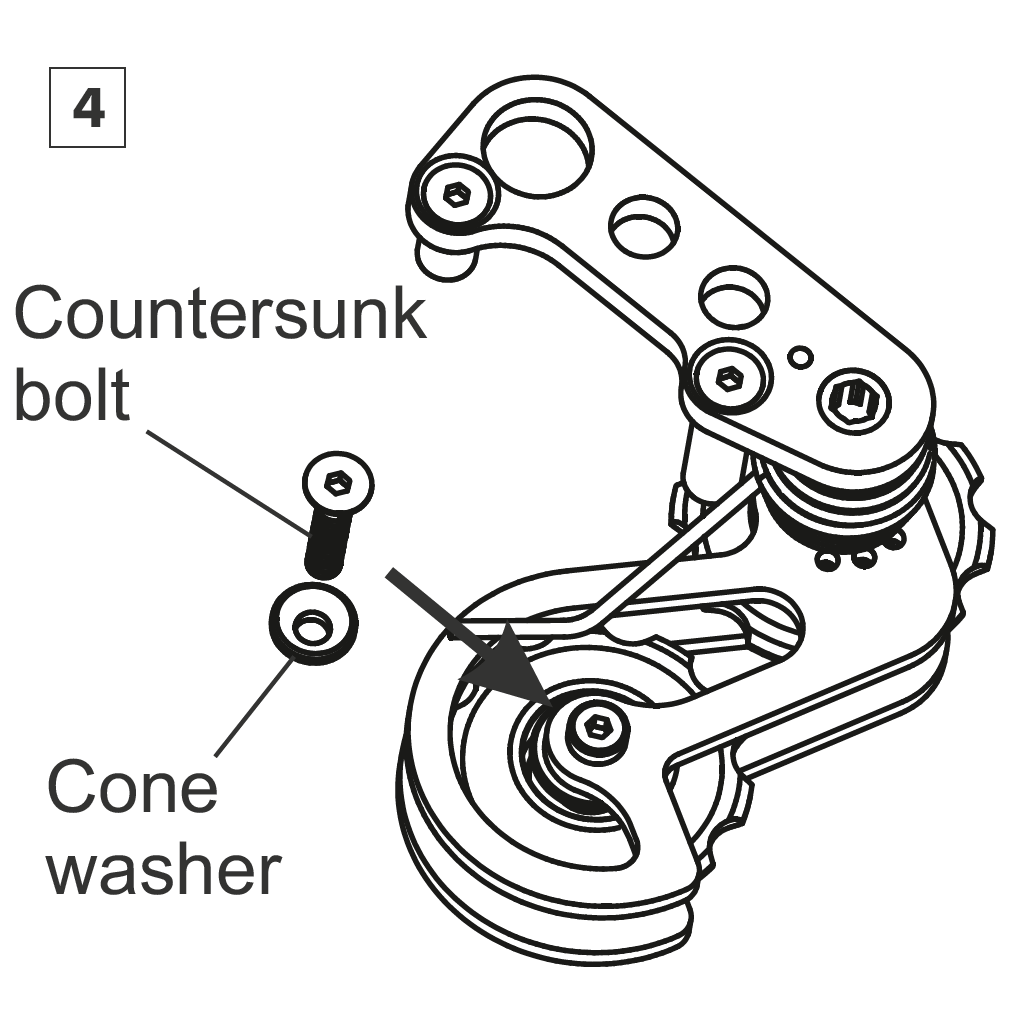
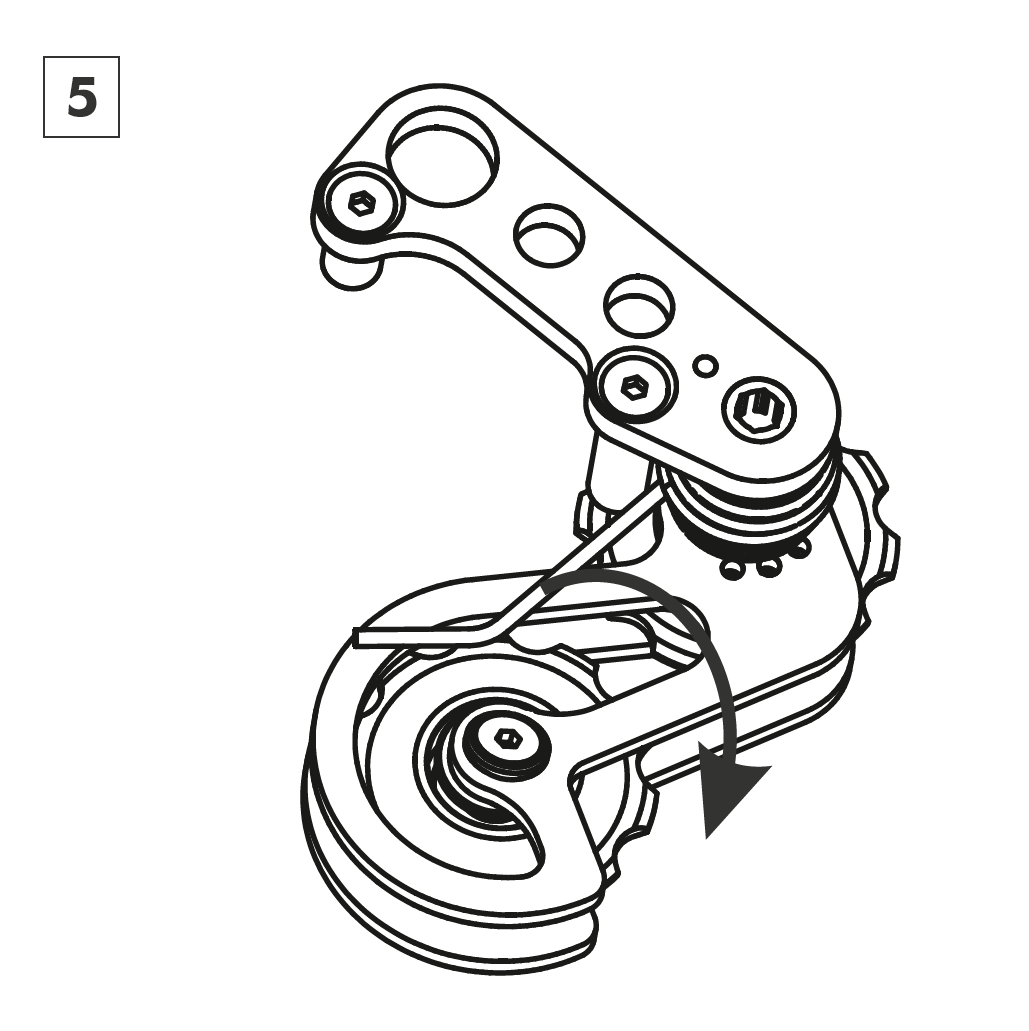
Bring the cage and the long leg of the spring together into a position similar to that shown in the diagram. Swap the old jockey wheel bolt for the new countersunk bolt (M4x20 - Torx TX20, tightening torque 3Nm/25in.lbs.) and cone washer.
Push the long leg of the spring in the direction of the arrow over the new bolt and let it spring back.
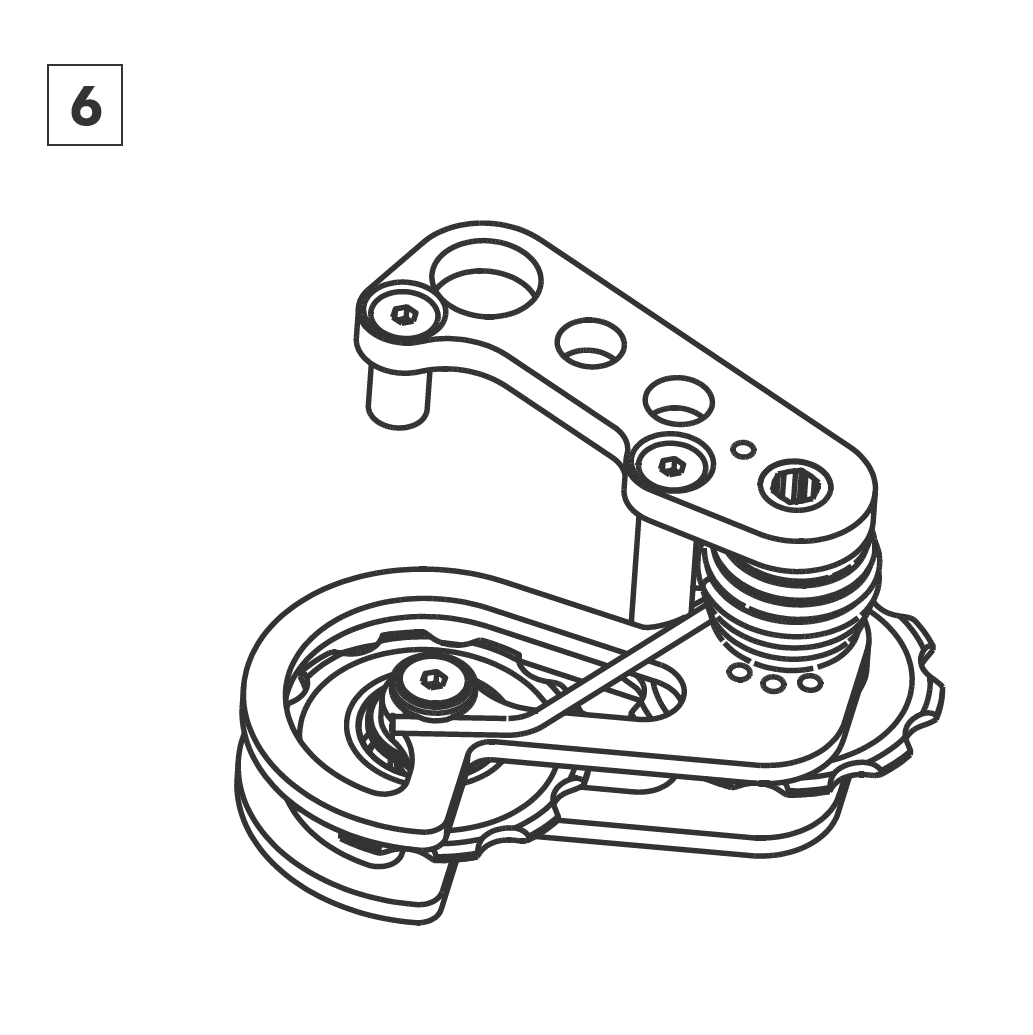
The long leg of the spring now sits against the cone washer and holds the cage back creating the tension.
Pointer
To replace the jockey wheels, remove the cage from the pivot axle (as in stage #1). Remove the lower jockey wheel bolt and replace the jockey wheels. Remount the chain tensioner (stages #3 and #4).